Audi Q3: Mobile Online Services
Overview - Mobile Online Services
The Internet Access Control Module -J666- (Audi music interface online, UE2) expands the External Audio Source Connection -R199- (AMI) using the following functions:
- Register web radio stations and Podcasts using the WLAN-Home Network and play them in the vehicle
- Use the USB broadband modem (UMTS stick) to listen to the web radio stations while traveling
- Generate a Wi-Fi hotspot with USB broadband modem (UMTS stick)
The SD-card reader is integrated in the Internet Access Control Module -J666-. The SD-card is used for the AMI online configuration (with www.audi.com). Refer to the Owner's Manual.
The Internet Access Control Module -J666- is installed together with the External Audio Source Connection -R199- (AMI). The Internet Access Antenna -R266- (WLAN-Antenna) is attached to the air duct channel behind the glove compartment.
The USB-broadband modem (UMTS stick) is connected to the External Audio Source Connection -R199- (AMI) using the adapter cable.
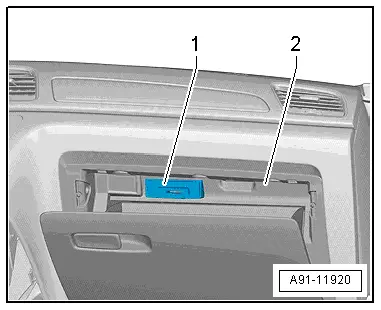
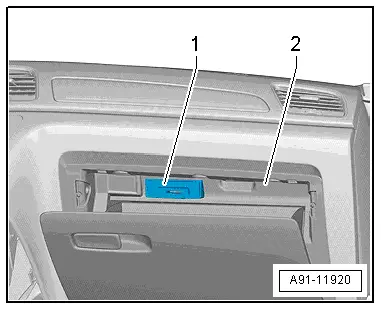
The Internet Access Control Module -J666--1- is located inside the glove compartment -2-.
Further information. Refer to the Operating Instructions.
The fault finding is performed using the Information Electronics Control Module 1 -J794- (DTC memory).
Internet Access Control Module -J666-, Removing and Installing
Internet Access Control Module -J666-, Removing and Installing
The Internet Access Control Module -J666--1- is located inside the glove compartment -2-.
Removing
- Turn off the ignition and all electrical equipment and remove the ignition key.
- Remove the glove compartment. Refer to → Body Interior; Rep. Gr.68; Storage Compartments and Covers; Glove Compartment, Removing and Installing.
- Release and disconnect the connector on the Internet Access Control Module -J666-.
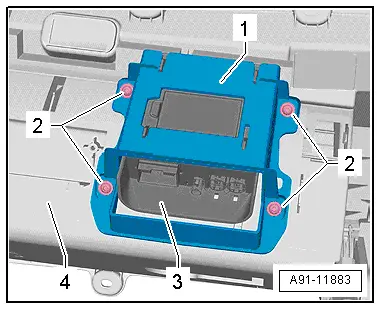
- Remove the bolts -2- from the bracket -1-.
- Remove the bracket -1- with Chip Card Reader Control Module -J666--3- from the glove compartment -4-.
- Remove the Internet Access Control Module -J666- from the bracket.
Installing
- Install in reverse order of removal. Note the following:
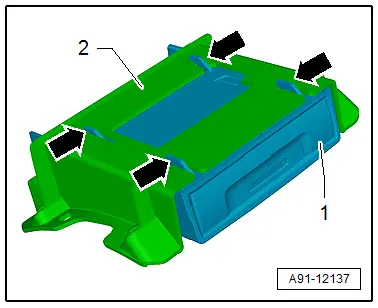
- Push the Internet Access Control Module -J666--1- in the bracket -2- until it engages "audibly"-arrows-.
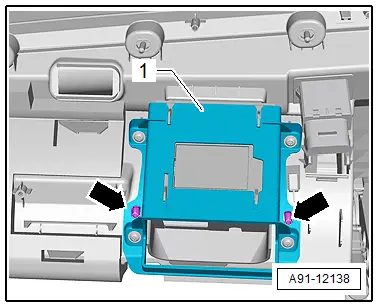
- Pay attention when installing the bracket -1- that the dome -arrows- on the bracket -1- are seated correctly.
- Peel off the protective backing from the internal battery.
If the Internet Access Control Module -J666- is replaced, the consumer must reconfigure it again.
Tightening Specifications

Internal Battery, Removing and Installing
The Internet Access Control Module -J666- has a battery. If Information Electronics Control Module 1 -J794- has stored a fault regarding the battery, then it is necessary to replace the battery.
Removing
- Turn off the ignition and all electrical equipment and remove the ignition key.
- Remove the Internet Access Control Module -J666-. Refer to → Chapter "Internet Access Control Module -J666-, Removing and Installing".
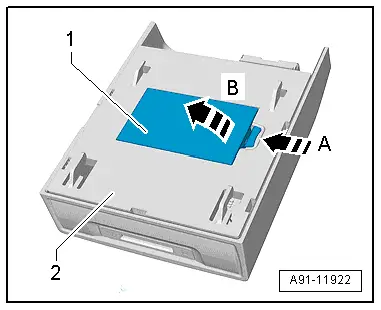
- Press the tab in direction of -arrow A- on the cover-1-, then fold the cover -1- in the direction of -arrow B- and remove it from the Internet Access Control Module -J666--2-.
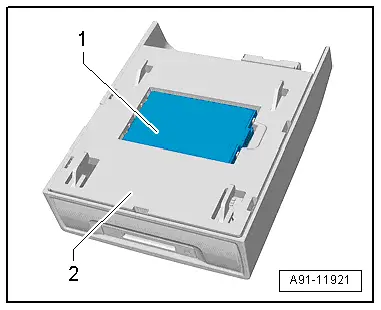
- Remove the battery -1- from the Internet Access Control Module -J666--2-.
Installing
- Install in reverse order of removal.
Connector Assignments
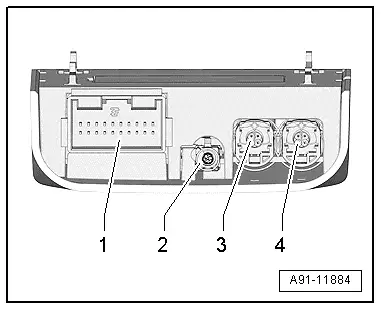
Internet Access Control Module -J666-
1 - 20-Pin Connector -T20g-
2 - Internet Antenna -R266- connection
3 - 4-Pin Connector -T4o- to the Information Electronics Control Module 1 -J794-
4 - 4-Pin Connector -T4n- to the External Audio Source Connection -R199-, AMI
 Note
Note
Unlisted connector terminals are not assigned.
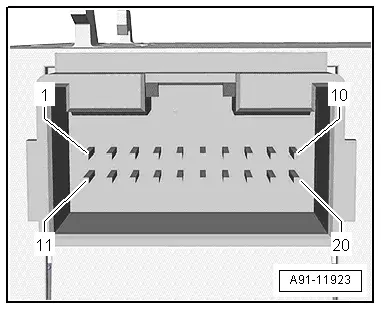
1 - 20-Pin Connector -T20g-
1 - USB, +5 V from Information Electronics Control Module 1 -J794-
2 - USB, ground from Information Electronics Control Module 1 -J794-
3 - USB, +5 V to the External Audio Source Connection -R199-, AMI
6 - Terminal 30
7 - Terminal 31
16 - Detect to the External Audio Source Connection -R199-, AMI
18 - Detect from the Information Electronics Control Module 1 -J794-
19 - CAN bus high, instrument cluster
20 - CAN bus low, instrument cluster
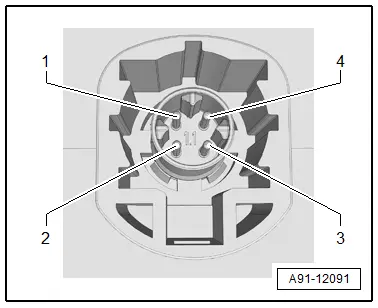
3 - 4-Pin Connector -T4o-
All pins are connected to the Information Electronics Control Module 1 -J794-.
1 - D (+)
2 - iPod recognized
3 - D (-)
4 - Ground
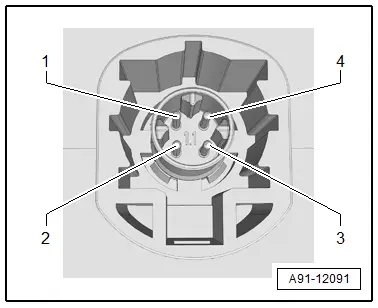
4 - 4-Pin Connector -T4n-
All pins are connected to the External Audio Source Connection -R199-, AMI.
1 - D (+)
2 - iPod recognized
3 - D (-)
4 - Ground
Special Tools
Special tools and workshop equipment required
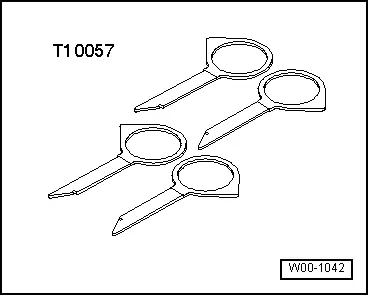
- Radio Removal Tool -T10057-
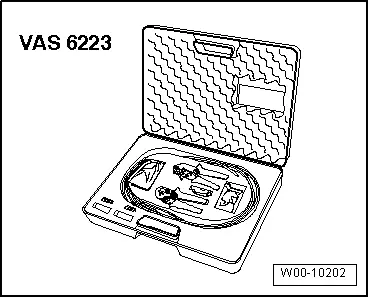
- Fiber-Optic Repair Set - Connector Protective Caps -VAS6223/9-.
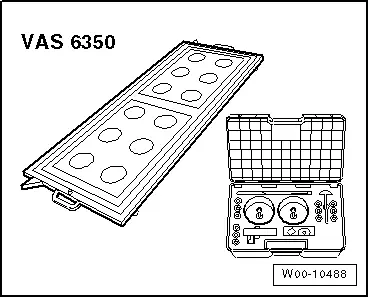
- Calibration Unit -VAS6350A-
- The Calibration Unit -VAS6350A- consists of the following parts:
- Calibration Tool - Wheel Center Mountings -VAS6350/1-
- Calibration Tool - Spacing Laser -VAS6350/2-
- Calibration Tool - Linear Laser -VAS6350/3-
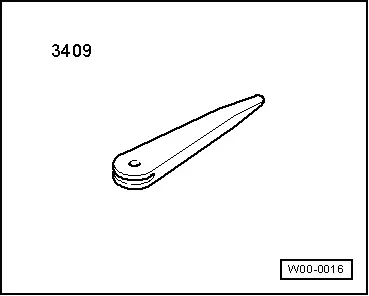
- Trim Removal Wedge -3409-
Revision History
DRUCK NUMBER: A005A001821
