Audi Q3: Connection for External Multimedia Devices
Overview - External Multimedia Devices
There are several External Audio Source Connection -R199- versions:
AMI (Audi Music Interface), MOST, UF7
The interface -1- is located in the center console storage compartment.
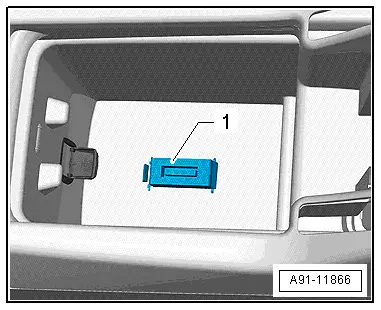
AUX IN jack, MOST, UF2
Installed in the center console storage compartment -1-.
These External Audio Source Connections -R199- are connected directly to the Information Electronics Control Module 1 -J794-.
Either an AMI or AUX IN socket is installed.
Different external audio sources can be connected to the External Audio Source Connection -R199-:
- iPod
- MP3 player
- USB Stick
Suitable adapter cables are needed. Refer to the Owner's Manual.
Perform the Fault Finding with the Vehicle Diagnostic Tester.
External Audio Source Connection -R199-, Removing and Installing
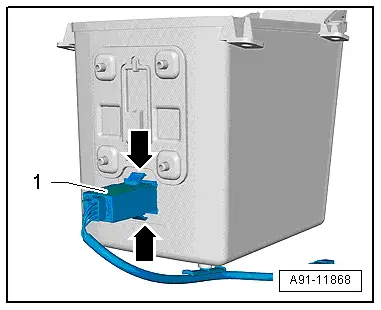
External Audio Source Connection -R199-, Removing and Installing, AUX IN
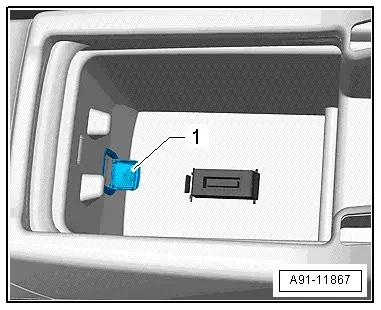
The External Audio Source Connection -R199--1- is located in the center console storage compartment.
- Turn off the ignition and all electrical equipment and remove the ignition key.
Removing
- Remove the center console storage compartment. Refer to → Body Interior; Rep. Gr.68; Center Console; Front Center Console Storage Compartment, Removing and Installing.
- Release and disconnect the connector from the External Audio Source Connection -R199--1-.
- Push the tabs -arrows- on the External Audio Source Connection -R199--1- together and push out the External Audio Source Connection - R199--1-.
Installing
- Install in reverse order of removal.
External Audio Source Connection -R199-, Removing and Installing, AMI
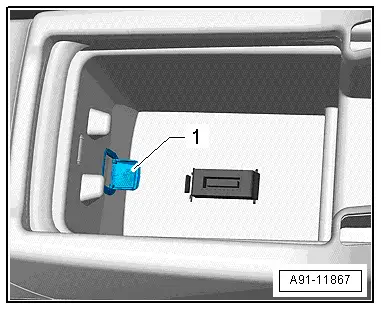
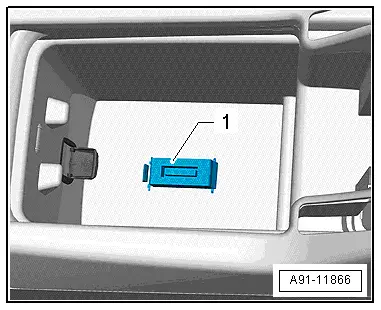
The External Audio Source Connection -R199--1- is located in the center console storage compartment.
Removing
- Turn off the ignition and all electrical equipment and remove the ignition key.
The wires for the AMI are components of the wiring harness. They cannot be replaced separately. If faulty, the adapter cable must be installed. Refer to the Parts Catalog.
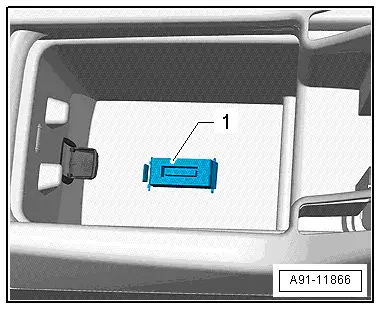
- Unclip the trim AMI -1- using the trim removal wedge.
- Remove the center console storage compartment. Refer to → Body Interior; Rep. Gr.68; Center Console; Front Center Console Storage Compartment, Removing and Installing.
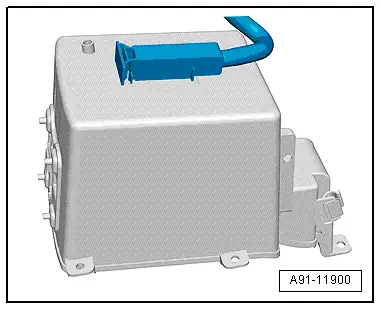
The 30-Pin Connector -T30a- is clipped in the storage compartment in from below.
The 4-Pin Connector -T4u--1- and 12-Pin Connector -T12k-/12-Pin Connector -T12y--2- are located on the Information Electronics Control Module 1 -J794-.
Installing
- Install in reverse order of removal.
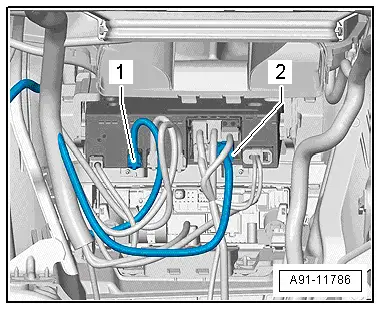
External Audio Source Connection Connectors
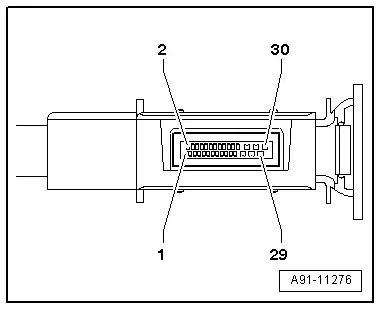
Connector Assignments, AMI, MOST
 Note
Note
Unlisted connector terminals are not assigned.
30-Pin Connector -T30a-
All pins are connected to the Information Electronics Control Module 1 -J794-.
1 - Left LF-In
2 - Right LF-In
3 - LF ground
4 - LF-In ground shielding
13 - iPod data
14 - iPod data
16 - iPod recognized
17 - D (+)
18 - D (-)
21 - Detect
22 - Ground
24 - CVBS cable (-)
25 - USB, Ground
27 - CVBS cable (+)
28 - USB, +5 V
Connector Assignments, AUX IN, MOST
 Note
Note
Unlisted connector terminals are not assigned.
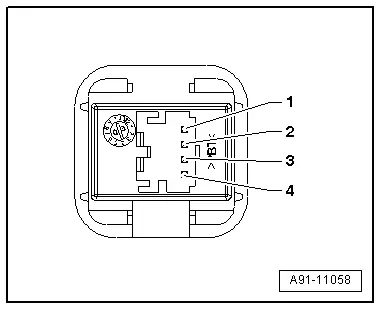
5-Pin Connector -T5b-
All pins are connected to the Information Electronics Control Module 1 -J794-.
1 - LF ground
2 - LF right
3 - LF left
4 - Ground Shielding
5 - Not Assigned
