Audi Q3: Connectors
Audi Q3 (8U) 2011-2018 Service Manual / Electrical System / Electrical Equipment / Wiring / Connectors
Connector Component Location Overview
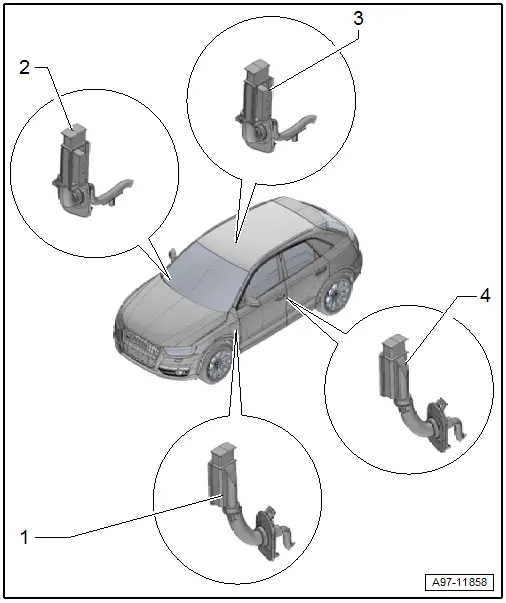
1 - Right Front Door Cut-Off Connector
- Disconnecting. Refer to → Chapter "Left Door Cut-Off Connector, Disconnecting".
2 - Right Rear Door Cut-Off Connector
- Disconnecting. Refer to → Chapter "Left Door Cut-Off Connector, Disconnecting".
3 - Left Rear Door Cut-Off Connector
- Disconnecting. Refer to → Chapter "Left Door Cut-Off Connector, Disconnecting".
4 - Left Front Door Cut-Off Connector
- Disconnecting. Refer to → Chapter "Left Door Cut-Off Connector, Disconnecting".
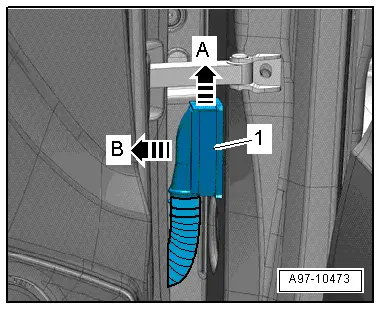
Left Door Cut-Off Connector, Disconnecting
Procedure
 Note
Note
The removal and installation is the same for both sides.
- Open the door.
- Release the connector catch in the direction of -arrow A- and remove the door cut-off connector -1- toward the outside in direction of -arrow B-.
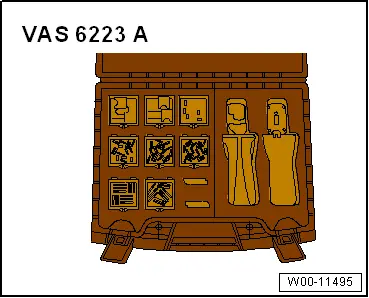
Special Tools
Special tools and workshop equipment required
- Fiber-Optic Repair Set - Connector Protective Caps -VAS6223/9- from Fiber-Optic Repair Set -VAS6223B-
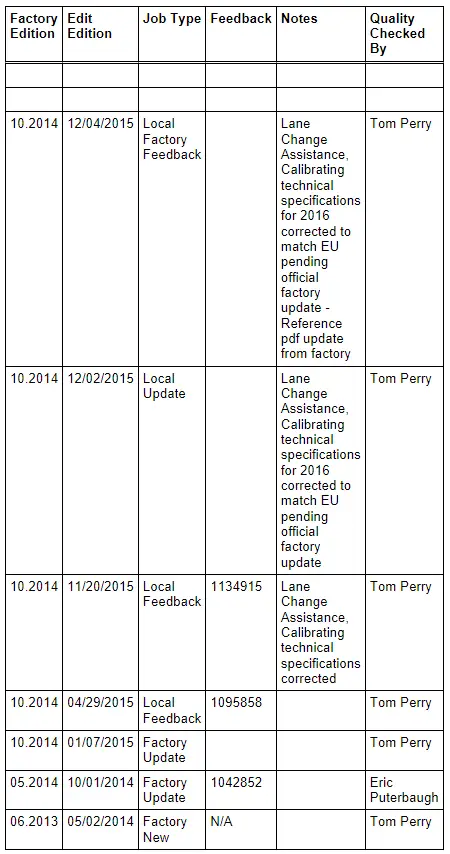
Revision History
DRUCK NUMBER: A005A001721
READ NEXT:
 General, Technical data
Safety Precautions
Safety Precautions when Working on Start/Stop System
Pay Attention to the Following when Working On Vehicles with
a Start/Stop System:
WARNING
Danger of personal inj
SEE MORE:
Rear Brake Pads, Removing and Installing
Brake Pads, Removing and Installing, Brakes 1KU
If old brake pads are being replaced with new ones, then it
is necessary to check the brake rotor thickness for wear. Pay
attention to the wear specifications for the brake rotor, refer
to
→ Chapter "Brakes Technical Data".
Special too
Overview - Seat Pan
Overview - Seat Pan, Modular Wiring Routing
1 - Corrugated Tube Upper Section
Must terminate flush with the wiring bracket
Must terminate flush with the corrugated tube lower section
2 - Wiring Harness
Do not twist installed wires
3 - Rear Wiring Brac
© 2019-2025 Copyright www.auq3.net
