Audi Q3: Luggage Compartment Side Trim Panel, Removing and Installing
Special tools and workshop equipment required
- Pry Lever -80-200-
- Omega Clip Tool -T40280-
Removing
- If installed, remove the luggage compartment roller cover.
- Remove the rear seat backrest. Refer to → Chapter "Rear Seat Backrest, Removing and Installing".
- Versions with a side cushion: remove the side cushion. Refer to → Chapter "Rear Side Padding With Side Airbag, Removing and Installing".
- Remove the rear sill trim. Refer to → Chapter "Rear Sill Panel Strip, Removing and Installing".
- Remove the front luggage compartment floor. Refer to → Chapter "Luggage Compartment Floor Panel, Removing and Installing".
- Remove the lock carrier trim. Refer to → Chapter "Lock Carrier Trim Panel, Removing and Installing".
- Remove the tie-down. Refer to → Chapter "Tie Down, Removing and Installing".
- Remove the Left Luggage Compartment Lamp -W18-/Right Luggage Compartment Lamp -W35- from the luggage compartment side trim panel. Refer to → Electrical Equipment; Rep. Gr.96; Lamps; Component Location Overview - Luggage Compartment Lamps.
- Remove the coat hook. Refer to → Chapter "Coat Hooks, Removing and Installing".
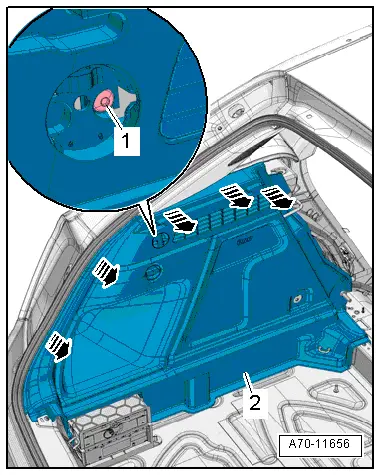
- Remove the bolt -1-.
- Remove the cover for the luggage compartment side panel.
- Remove the rear lid seal near the luggage compartment side trim panel.
- Pry out the luggage compartment side trim panel -2- at the front and back using the Pry Lever -80 - 200- from the body -arrows-.
- Carefully remove the luggage compartment side trim panel from the D-pillar trim -arrows-.
- Remove the luggage compartment side trim panel from the catch for the rear seat backrest.
Installing
Install in reverse order of removal.
Installation notes, for example tightening specifications, replacing components. Refer to → Chapter "Overview - Luggage Compartment Side Trim Panel".
Luggage Compartment Floor Panel, Removing and Installing
Luggage Compartment Floor Panel, Removing and Installing
Removing
- Remove the rear seat backrest. Refer to → Chapter "Rear Seat Backrest, Removing and Installing".
- Remove the rear luggage compartment floor.
- Remove the vehicle tool kit mounting box.
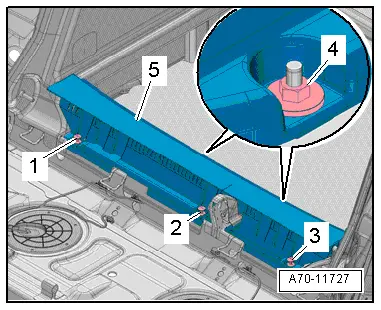
- remove the expanding clips -1 to 3-.
- Remove the nut -4-.
- Remove the front luggage compartment floor -5-.
Installing
Install in reverse order of removal.
Installation notes, for example tightening specifications, replacing components. Refer to → Chapter "Overview - Luggage Compartment Floor".
Luggage Compartment Floor Panel Trim, Removing and Installing
Removing
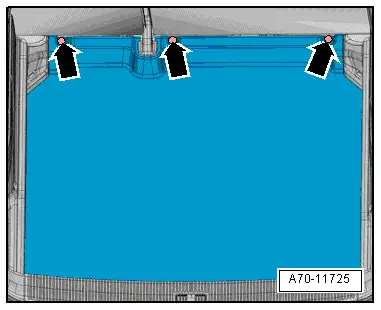
- Remove the expanding clips -arrows-.
- Disengage the luggage compartment liner and remove from the vehicle.
Installing
Install in reverse order of removal.
Installation notes, for example tightening specifications, replacing components. Refer to → Chapter "Overview - Luggage Compartment Floor".
Tie Down, Removing and Installing
Removing
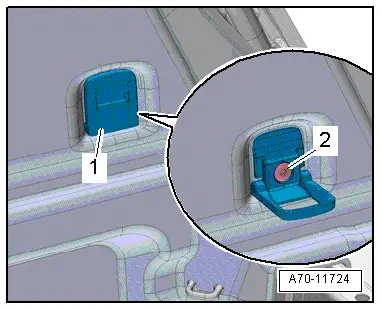
- Fold up the tie down -1-.
- Remove the bolt -2- and the mount for the tie down.
Installing
Install in reverse order of removal.
Installation notes, for example tightening specifications, replacing components. Refer to → Chapter "Overview - Luggage Compartment Side Trim Panel".
Coat Hooks, Removing and Installing
Removing
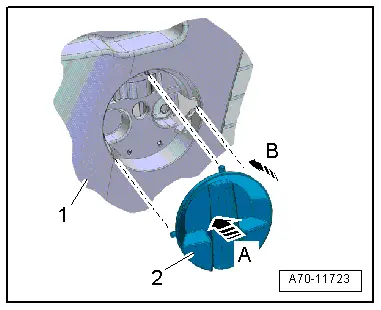
- Push the coat hook -2- into the mount -1--arrow A-.
- Turn the coat hook counter-clockwise -arrow B- and remove.
Installing
Install in reverse order of removal.
Installation notes, for example tightening specifications, replacing components. Refer to → Chapter "Overview - Center Console".
