Audi Q3: Seat Pan Cover and Cushion, Separating
Seat Pan Cover and Cushion, Separating, Standard/Folding Seat
Special tools and workshop equipment required
- Upholstery Clip Pliers -VAG1634-
Removing
- Remove seat cover with seat cushion for seat pan. Refer to → Chapter "Seat Pan Cover and Padding, Removing and Installing, Standard/Folding Seat".
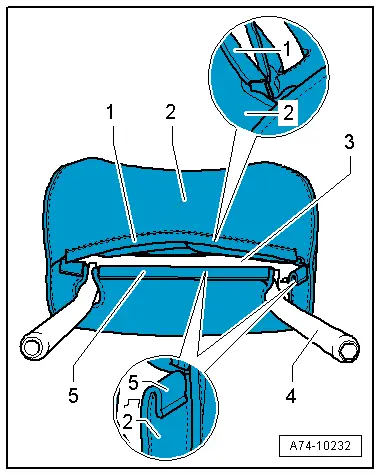
- Remove seat cover -1- in the rear and side from the seat cushion -2- and cut upholstery clips -3- using pliers -4-.
Installing
Install in reverse order of removal.
Installation notes, for example tightening specifications, replacing components. Refer to → Chapter "Overview - Seat Pan Cover and Cushion, Standard/Folding Seat".
Seat Pan Cover and Cushion, Separating, Sport Seat
Special tools and workshop equipment required
- Upholstery Clip Pliers -VAG1634-
Removing
- Remove the seat cover with the seat cushion for the Sport seat with the seat depth adjuster. Refer to → Chapter "Seat Pan Cover and Padding, Removing and Installing, Sport Seat".
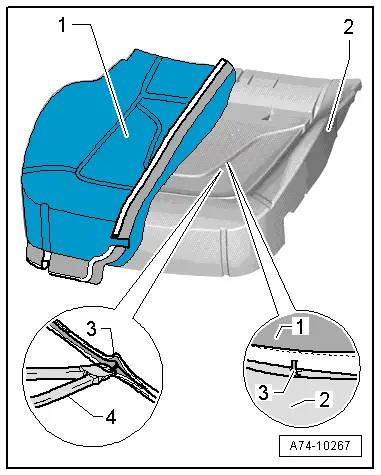
- Remove the retaining channel -2- from the retainers -5-.
- Disengage the seat cover from the retainers -4- on both sides.
- Remove the support -3- with the seat depth adjuster seat cushion from the seat cover -1-.
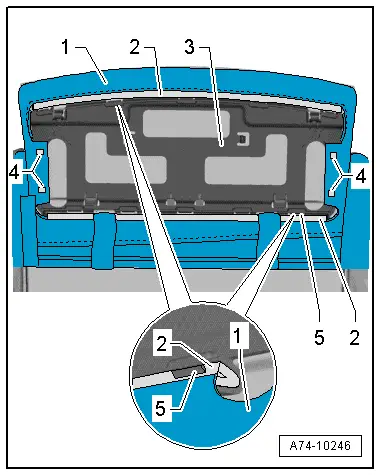
- Remove the seat cover -1- from the seat cushion -2- and cut the upholstery clips -3- using pliers -4-.
Installing
Install in reverse order of removal.
Installation notes, for example tightening specifications, replacing components. Refer to → Chapter "Overview - Seat Pan Cover and Padding, Sport Seat".
Backrest Cover and Cushion, Separating
Special tools and workshop equipment required
- Upholstery Clip Pliers -VAG1634-
Removing
- Remove the backrest cover with the backrest cushion. Refer to → Chapter "Backrest Cover and Cushion, Removing and Installing".
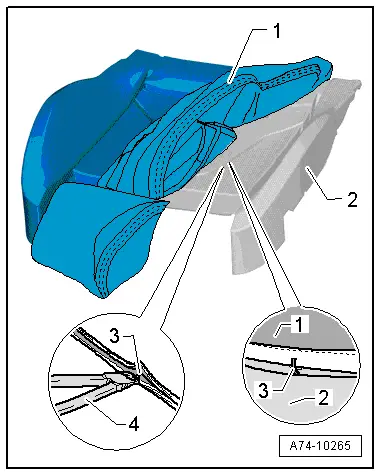
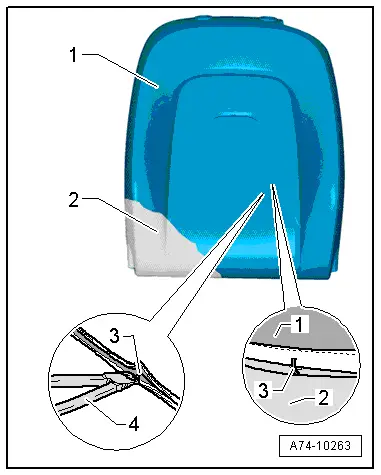
- Pull off backrest cover -1- from the backrest cushion -2- as far as possible and cut upholstery clips -3- using pliers -4-.
Installing
Install in reverse order of removal.
Installation notes, for example tightening specifications, replacing components. Refer to → Chapter "Overview - Backrest Cover and Cushion".
Headrest Cover and Cushion, Removing and Installing
Special tools and workshop equipment required
- Trim Removal Wedge -3409-
Removing
- Remove the headrest. Refer to → Chapter "Headrest, Removing and Installing".
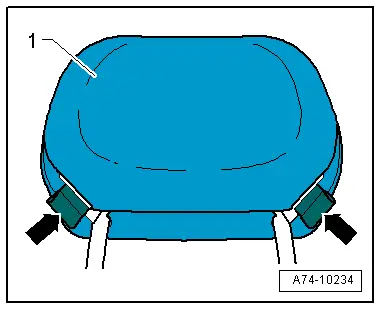
- Open the side openings -arrows- on the cover -1-.
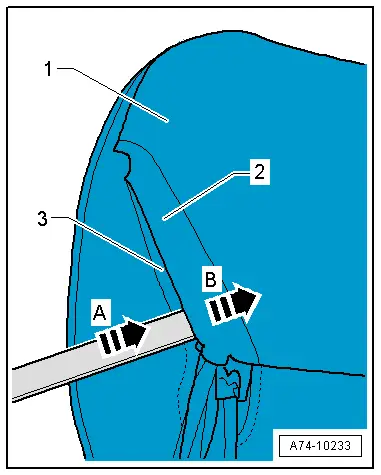
- Insert the Trim Removal Wedge -3409- or a flat-head screwdriver between the openings -1- in direction of -arrow A-.
- Tension the lower U-channel -3- in direction of -arrow B-.
- Remove the upper side of the cover with the flat channel -2- from the U-channel.
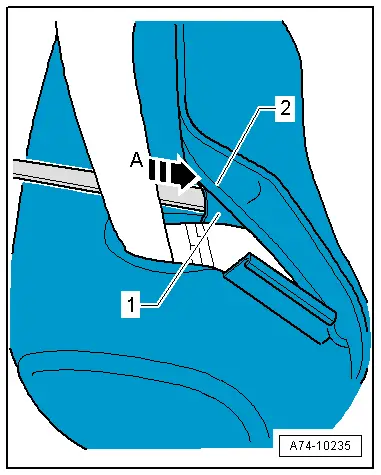
- Open the zipper by inserting the Trim Removal Wedge -3409- or a flat-head screwdriver between the zipper and the cover.
- Tension the lower U-channel -1- in direction of -arrow A-.
- Remove the upper side of the cover with the flat channel -2- from the U-channel -1-.
 Note
Note
The cover must be completely open to remove the padding.
- Remove the cover and cushion from the headrest mount.
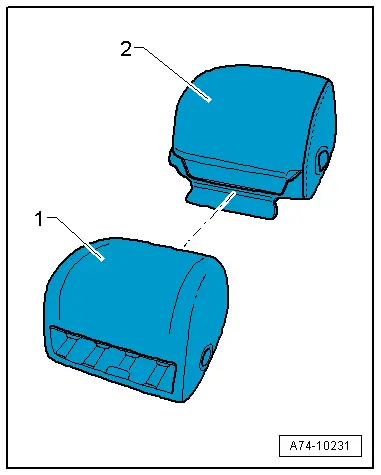
- Remove cushion -1- out of cover -2-.
Installing
- Insert cushion -1- with proper fit in cover -2-.
- Insert headrest support in the cushion with cover.
- Close the main zipper by moving the upper cover flat channel -1- over the cover -2-.
- Push the edge of the material with the flat channel into the U-channel -5-.
- Closing the side locks is similar to the closing the main lock.
- After closing the main zipper and the side zippers with a needle or other pointed object, line up the cover and the profiles.
- Make sure the cover lies on the cushion -3- without any wrinkles and without seam markings.
Install in reverse order of removal.
Installation notes, for example tightening specifications, replacing components. Refer to → Chapter "Overview - Headrest Cover and Cushion".
