Audi Q3: Tool Descriptions
Crimping Pliers with Insert
The Crimping Pliers without Insert -VAS1978/1- with Crimping Pliers - Insert 2 -VAS1978/2- is a component of the Wiring Harness Repair Set -VAS1978- and is used to crimp the connector during the wiring harness repair.
 Note
Note
- The Wiring Harness Repair - Crimping Plier - Base Tool -VAS1978/1-2- can also be used together with the Wiring Harness Repair - Crimping Head - .35-2.5mm -VAS1978/1-1- or Wiring Harness Repair Set - Crimping Head - 4-6mm -VAS1978/2A- to crimp the connectors as an alternative. Refer to → Chapter "Crimping Pliers - .35-2.5mm -VAS1978/1A-".
- Always be sure to use the correct crimping slot for the crimping connection used.
- Do not crimp wire insulation.
Contact Release Tools
Various release tools are used to remove the different terminals from connector housing without damage.
A selection of release tools are a component of the Wiring Harness Repair Set -VAS1978- and the Wiring Harness Repair Set -VAS1978A-. The Release Tool Set -VAS1978/35- contains the entire set of release tools. Refer to → Chapter "Release Tool Set -VAS1978/35-".
 WARNING
Some tools are supplied with a tool safety clip, which is slid over the tool points after using the tool, in order to protect other workers from injuries and tool points from damage.
Connector housings, unlocking and disassembling. Refer to → Chapter "Connector Housings, Releasing and Disassembling".
Single Wire Seal Assembly Tools
Assembly tools serve the purpose of allowing the single wire seals to be slid without damage into the connector housing up to stop, this achieves a complete seal between single wire and connector housing.
Four assembly tools for single wire seals are components of the Wiring Harness Repair Set -VAS1978B- and its previous versions.
Assembly of single wire seals. Refer to → Chapter "Single Wire Seals, Installing".
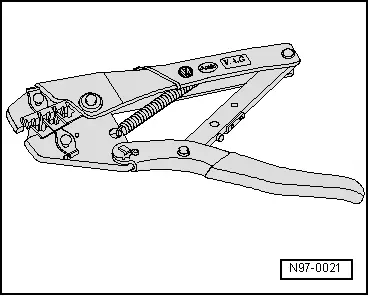
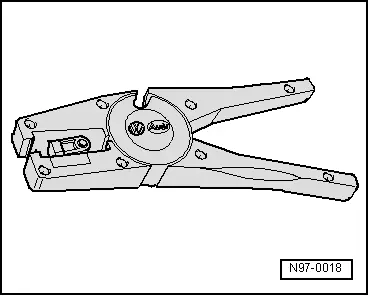
Wiring Harness Repair Set - Wire Strippers -VAS1978/3-
The Wiring Harness Repair Set - Wire Strippers -VAS1978/3- is used for professional stripping and cutting of wires.
The Wiring Harness Repair Set - Wire Strippers -VAS1978/3- is a component of the Wiring Harness Repair Set -VAS1978B- and its previous versions.
Wire stripper has an adjustable stop in its pliers-jaws which can be set to the desired length of wire insulation to be removed.
Stripping
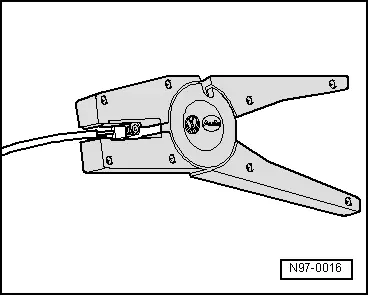
- Set the slideable stop in pliers-jaws to the desired length dimension to be stripped.
- Insert wire end from front up to stop into jaws of pliers and squeeze the pliers completely.
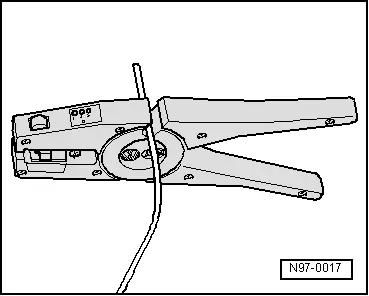
- Open pliers again and remove the stripped wire end.
- If necessary, cut wires using side-cutter function on the top of the wire stripper.
Wiring Harness Repair Set - Hot Air Blower -VAS1978/14A-
 Caution
When heat-shrinking crimp connections, be careful not to damage any other wiring, plastic parts or insulating material with the hot nozzle of the hot air gun.
Always observe operating instructions of heat gun.
The Wiring Harness Repair Set - Hot Air Blower -VAS1978/14A- is used together with the Wiring Harness Repair - Blower - Shrink Element -VAS1978/15A- to heat-shrink the crimp connectors. After crimping, crimp connections must be heat-shrunk using hot air gun to prevent moisture penetration.
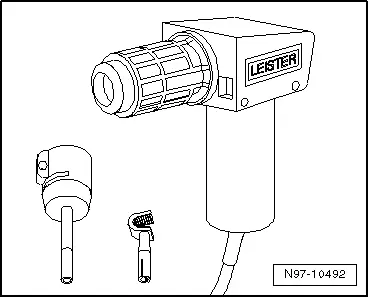
The Wiring Harness Repair Set - Hot Air Blower -VAS1978/14A- is a component of the Wiring Harness Repair Set -VAS1978B- and its previous versions.
- Insert the Wiring Harness Repair - Blower - Shrink Element -VAS1978/15A- on the Wiring Harness Repair Set - Hot Air Blower -VAS1978/14A-.
 Caution
Risk of damaging surrounding components.
- When heat-shrinking crimp connections, be careful not to damage any other wiring, plastic parts or insulating material with the hot nozzle of the hot air blower.
- Always observe operating instructions of heat gun.
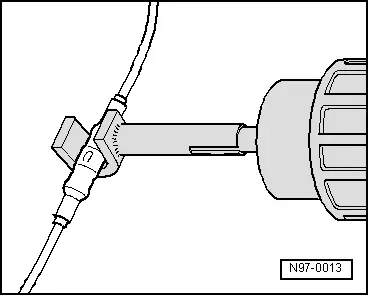
- Heat crimp connection using the hot air blower lengthwise from center outward until it is sealed completely and adhesive comes out the ends.
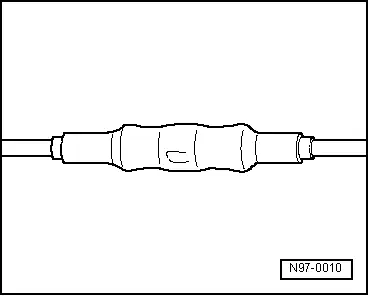
- This is how the completed repair location with individual crimp connector should appear.
Crimping Pliers - .35-2.5mm -VAS1978/1A-
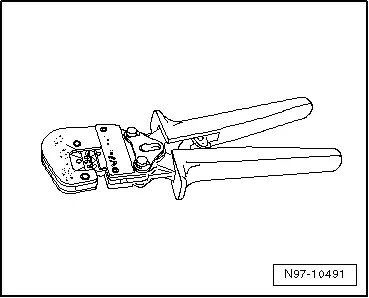
The Crimping Pliers - .35-2.5mm -VAS1978/1A- or the Wiring Harness Repair - Crimping Plier - Base Tool -VAS1978/1-2- together with the Wiring Harness Repair - Crimping Head - .35-2.5mm -VAS1978/1-1-, or the Wiring Harness Repair Set - Crimping Head - 4-6mm -VAS1978/2A- from the wiring harness repair set is used to compress the crimp connectors.
Crimp connectors, press using the Crimping Pliers - .35-2.5mm -VAS1978/1A-.
The following crimping heads are available for the Wiring Harness Repair - Crimping Plier - Base Tool -VAS1978/1-2-:
- Crimping Head 0.35 mm 2 - 2.5 mm 2 -VAS1978/1-1-
- Crimping Head 4.0 mm 2 - 6.0 mm 2 -VAS1978/2A-
- Wiring Harness Repair Set - Crimping Head - JPT -VAS1978/9-1-
In conjunction with Wiring Harness Repair Set - Crimping Head - JPT -VAS1978/9-1-, crimping pliers are used to crimp terminals onto individual wires when repairing wiring cross-sections up to 0.35 mm2 .
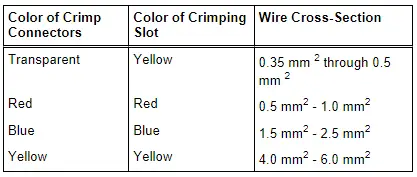
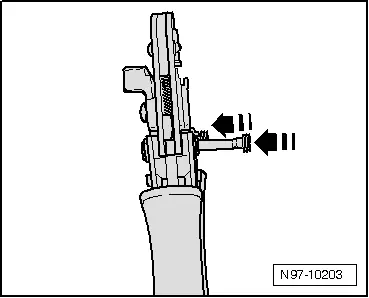
Changing Crimping Head
- Open crimp pliers completely.
- Disengage both locking pins -arrows- from crimp pliers basic tool.
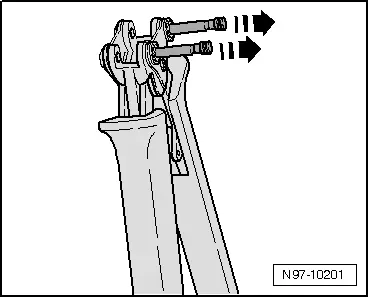
- Insert the required crimping head from above in direction of -arrow- in crimp pliers basic tool.
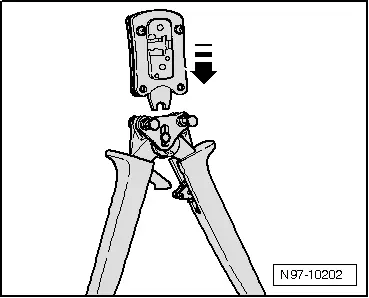
- Lock the crimping head by pressing in the pins in direction of -arrows- into crimp pliers basic tool.
READ NEXT:
 Airbag and Belt Tensioner Wires, Repairing
In addition to the general repairs on wiring harnesses, the following methods
and instructions must be observed for repairs on airbag- and seat belt tensioner
wires:
WARNING
The air
0.22 mm 2 Wire, Repairing with Individual
Crimp Connector
Procedure
- Free up the wire to be repaired approximately 20 cm on both
sides of the repair point.
Caution
Risk of damaging the electrical wires.
Expose wrapped wiring harnesses c
Repairing a Wire 0.35 mm 2 or Greater with
Individual Crimp Connector
Procedure
- Free up the wire to be repaired approximately 20 cm on both
sides of the repair point.
Caution
Risk of damaging the electrical wires.
Expose wrapped wiring harnesses c
SEE MORE:
Driver/Front Passenger Door Warning Lamp -W30-/-W36-, Removing and
Installing
Removing
- Press the tab -1- with a
flat-blade screwdriver and remove the door warning lamp
-2-.
- Disconnect the connector -3-.
- Carefully pry out the cover over the lamp in direction of
-arrow-.
- Remove the bulb -1- from the
socket -2- on the back of the door
Wheel, Changing and Mounting
Special tools and workshop equipment
required
Torque Wrench 1332 40-200Nm -VAG1332-
Wheel Lock Set -T10101-
Wheel Lock Set -T10101A-
Wheel Lock Set -T40004-
Wheel Lock Set -T40073-
Wax Spray -D 322 000 A2-
Optimol TA Paste -G 052 109 A2-
Note
The wrench size of the inc
