Audi Q3: Wiring Harness Repair Set
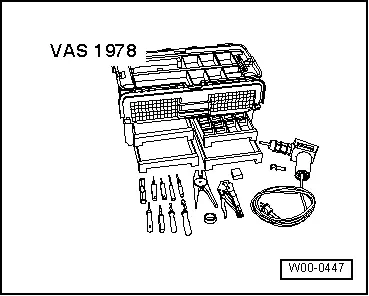
Wiring Harness Repair Set -VAS1978-
The Wiring Harness Repair Set -VAS1978- makes optimal repair quality possible in the realm of vehicle electronics. Using the tools, repairs affecting harness connectors and for breaks in wiring can be performed. For this purpose, complete repair wires with terminals already crimped on are used and can be connected to vehicle-specific wiring harness by the use of crimp connections. A pair of crimping pliers with three different crimp slots and a hot air gun for shrinking the crimp connections provide trouble-free electrical connection.
 Note
Note
Additional information:
Refer to Wiring Harness Repair Set -VAS1978- Operating Instructions.

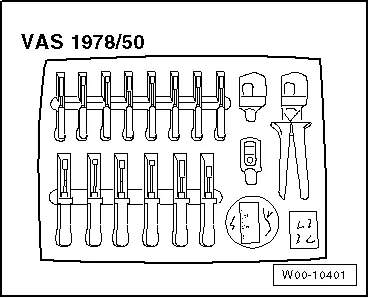
Upgrade Kit For VAS1978 -VAS1978/50-
The Upgrade Kit For VAS1978 -VAS1978/50- is required in order to bring the "old" Wiring Harness Repair Set -VAS1978- up to the new standard of the Wiring Harness Repair Set -VAS1978A-. The upgrade kit contains four assembly- and ten release tools as well as new crimping pliers for crimp connections with Crimping Heads for 0.35 - 2.5 mm 2-VAS1978/1-1-, 4.0 - 6.0 mm²-VAS1978/2A- and the Wiring Harness Repair Set - Crimping Head - JPT -VAS1978/9-1-. Furthermore it contains new stickers, a new set of user instructions, crimp connections for 0.35 mm2-wire cross sections and a roll of black felt adhesive tape.

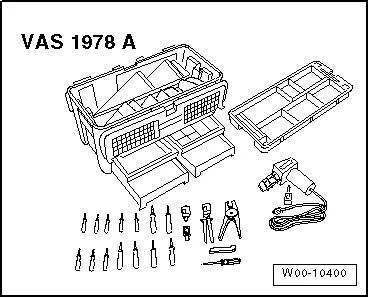
Wiring Harness Repair Set -VAS1978A-
The new Wiring Harness Repair Set -VAS1978A- makes optimal repair quality possible in the realm of vehicle electronics. Using the new pliers, repairs affecting harness connectors and for breaks in wiring can be performed. For this purpose, complete repair wires with terminals already crimped on are used and can be connected to vehicle-specific wiring harness by the use of the four different types of crimp connections. A pair of new crimping pliers with crimping heads and a hot air gun for shrinking the crimp connections provide trouble-free electrical connection.
 Note
Note
Additional information:
Refer to Wiring Harness Repair Set - VAS1978A- Operating Instructions.

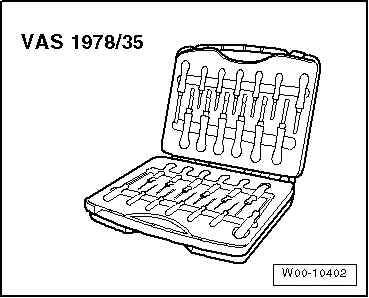
Release Tool Set -VAS1978/35-
The Release Tool Set -VAS1978/35- is used to release the various primary and secondary locking mechanisms on VW-group vehicles. The set consists of 26 different tools which can be used to professionally release or assemble e.g. round connector systems, flat terminals with one or two locks as well as single wire seals.
The allocation of the correct release tools to the respective locking mechanisms can be found in the table in the Release Tool Set -VAS1978/35- Operating Instructions.

Wiring Harness Repair Set -VAS631001-
The Wiring Harness Repair Set -VAS631001- makes optimal repair quality possible in the realm of vehicle electronics. Using this wiring harness repair set, repairs affecting aluminum wires in the area of the harness connectors and for breaks in wiring can be performed. The copper repair wires are also used and complete repair wires with already crimped on/connected contacts. The connection with the vehicle-specific wiring harness takes place with three different wire cross-sections butt connectors.
The Wiring Harness Repair Set -VAS631001- for aluminum wires is comprised of the following components:
- Crimping tool without crimp insert and positioning aid -VAS631001/1-
- Crimping insert and positioning aid 25 mm2-aluminum wires -VAS631001/2-
- Crimping insert and positioning aid 4 mm2-aluminum wires -VAS631001/3-
- Crimping insert and positioning aid 6 mm2-aluminum wires -VAS631001/4-
- Wire stripper for aluminum wires -VAS631001/5-
 Caution
For repairing the aluminum wires only use the corresponding butt connectors with heat-shrinkable tube. Refer to the Parts Catalog.
 Note
Note
Additional information:
Refer to the Wiring Harness Repair Set -VAS631001- Owner's Manual.
Wiring Harness Repair Set VAS631003 - VAS631003-
The Wiring Harness Repair Set -VAS631003- makes optimal repair quality possible in the realm of vehicle electronics. With this wiring harness-repair kit repairs can be performed on 10mm2 and 16mm2 wires in the area of the connections and on open circuits. The repair wires are also used an complete repair wires with already crimped on/connected contacts. The connection with the vehicle-specific wiring harness takes place with two different wire cross-sections butt connectors.
The Wiring Harness Repair Set VAS631003 -VAS631003- for 10mm2 and 16mm2 wires is comprised of the following components.
- Case with Inlays -VAS631003/1-
- Hand Pliers -VAS631003/2-
- Insulation Removal Tool -VAS631003/3-
- Pair of Cable Cutters -VAS631003/4-
- Exchangeable head 10mm2 -VAS631003/5-
- Exchangeable head 16mm2 -VAS631003/6-
 Note
Note
Additional information:
Refer to the Wiring Harness Repair Set VAS631003 -VAS631003- Owner's Manual.

