Audi Q3: General Information
Before beginning balancing, the following requirements must be fulfilled.
- Tire inflation pressure must be OK.
- The tire tread must not be worn down on one side and should be at least 4 mm deep.
- The tire must not have any flat spots.
It is not possible to balance a flat spot.
- The tires must not have any damage such as cuts, holes, foreign debris, etc.
- The suspension, steering, tie rods and damper must be in proper working order.
- A road test has been performed.
Road Test, Performing Before Balancing
If a vehicle comes to the workshop with the complaint vibration, a road test must be performed before balancing the wheels.
- That way, information about the type of vibration can be obtained.
- Observe at which speed range the disturbance takes place.
- Raise the vehicle on the platform immediately after the road test.
- Mark the installation position on the tire.
- Remove wheels from vehicle.
 Caution
If brake pads are ceramics, wheel must not fall on brake disc, otherwise it will be irreparably damaged. To remove/install wheel, install long assembly pin instead of wheel bolts in top position (12:00 position) and short assembly pin in wheel bolt mounts for support. In this way, the wheel can glide on the assembly aids when removing/installing.
- Balance the wheels.
Stationary Balancing Machine
Special tools and workshop equipment required
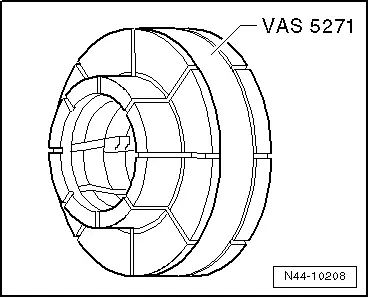
- Wheel Centering System Adapter -VAS5271-
- Wheel Balancer Clamping Adapter - 5 Lug -VAS6243-
 Note
Note
Please keep in mind that cleanliness is the most important when balancing as well, just as for any other repairs you perform. Only then can a proper result be obtained!
 Caution
The balance weights must be glued on so that rub against the brake caliper or the suspension.
- Tension wheel on balancing machine.
 Note
Note
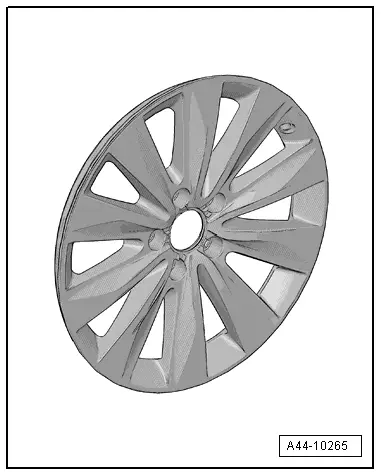
Wheels with a sensitive surface, glued-on wheel trim. Refer to → Chapter "Wheels with a Sensitive Surface, Glued-On Wheel Trim".
 Note
Note
- Be careful not to scratch off the glued- on wheel trim on these rims.
- The surface of the wheel trim is very sensitive.
- The rim will have be replaced if the wheel trim is damaged.
- The wheel trim cannot be replaced.
Dirt and rust in the area of the contact surfaces and centering of the wheel distort the result.
- Clean contact surfaces, centering seat and wheel disc before tensioning wheel on balancing machine!
- Tension wheel with tire on balancing machine.
 Caution
The balance weights must be glued on so that rub against the brake caliper or the suspension.

 Note
Note
- To mount wheel on wheel balancer use, for example, the Wheel Centering System Adapter -VAS5271-.
- This way a 100% centering of the wheel and gentle mounting is possible!
- It is not possible to center it 100% on balancing machine with conical pensioners.
- With a deviation of 0.1 mm outside the center, there is an imbalance of 10 grams on the wheel/tire.
 Note
Note
- Use Wheel Balancer Clamping Adapter - 5 Lug -VAS6243- to gently mount a wheel on the wheel balancer.
- This way improved balance results are attained and the surface of the rim is protected, for example, on chrome wheel rims.

Wheels with a Sensitive Surface, Glued-On Wheel Trim
Special tools and workshop equipment required
- Tension Plate -VAS6652-
- Pressure Bolt -VAS6652/1-
 Note
Note
- Be careful not to scratch off the glued- on wheel trim on these rims.
- The surface of the wheel trim is very sensitive.
- The rim will have be replaced if the wheel trim is damaged.
- The wheel trim cannot be replaced.
Use only the Tension Plate -VAS6652- and the Pressure Bolt -VAS6652/1-.

Wheel/Tire Balancing Procedure
 Note
Note
Wheels with a sensitive surface, glued-on wheel trim. Refer to → Chapter "Wheels with a Sensitive Surface, Glued-On Wheel Trim".
 Caution
The balance weights must be glued on so that rub against the brake caliper or the suspension.
 Note
Note
- Be careful not to scratch off the glued- on wheel trim on these rims.
- The surface of the wheel trim is very sensitive.
- The rim will have be replaced if the wheel trim is damaged.
- The wheel trim cannot be replaced.
- Let the wheel and tire rotate on the wheel balancer.
- Check the run of the characteristic lines on the sidewall of the tire in the area of the rim flange.
- Check the tire wear pattern while the wheel and tire are rotating.
 Note
Note
In the event of one-sided wear, flat spots from braking or severe wear spots, smooth running cannot be achieved by balancing. In this case, the tire must be replaced.
- Check the run-out of the wheel and tire. If the wheel with tire runs untrue although there are no flat spots, a radial or lateral run-out may be the cause.
- Check wheel with tire for radial and lateral run-out, radial run-out (RR) and lateral runout (LR)!
- If the radial and lateral run-out are within the specified tolerance, balance the wheel and tire.
 Note
Note
- Do not use more than 60 grams of weight per wheel.
- If more weight is necessary, a smoother running can achieved by matched mounting of the tire. Tires, matching. Refer to → Chapter "Matching".
- The display in the balancing machine should show 0 grams.
- Bolt the wheel to the vehicle.
 Caution
If brake pads are ceramics, wheel must not fall on brake disc, otherwise it will be irreparably damaged. To remove/install wheel, install long assembly pin instead of wheel bolts in top position (12:00 position) and short assembly pin in wheel bolt mounts for support. In this way, the wheel can glide on the assembly aids when removing/installing.
- First tighten the bottom wheel bolt by hand to approximately 30 Nm.
- Now tighten the remaining wheel bolts diagonally also to about 30 Nm. This process centers the wheel on the wheel hub.
- Put the vehicle on its wheels.
- Now use a torque wrench to tighten the wheel bolts diagonally to the specified tightening specification.
- Carry out a road test.
 Note
Note
- If a vibration is still detected during the road test, the cause may be due to tolerance in the wheel centering.
- The component tolerances of wheels and wheel hubs can be additive in unfavorable cases. Vibration can result from this. This can be eliminated using a finish balancer.


