Audi Q3: Solar Battery Maintainer -VAS6102A-
Solar Battery Maintainer -VAS6102A- Device Description
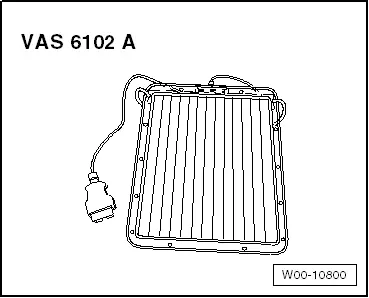
Solar Battery Maintainer -VAS6102A-
The Solar Battery Maintainer -VAS6102A- supports the vehicle electrical system and prevents the Battery -A- from self-discharging.
The Solar Battery Maintainer -VAS6102A- reaches a maximum voltage of 14.3 V and a maximum charge current of 255 mA.
All chargeable lead- and lead gel batteries can be charged with the Solar Battery Maintainer -VAS6102A-.
The Solar Battery Maintainer -VAS6102A- is connected to the diagnostic connection in the vehicle.
The Solar Battery Maintainer -VAS6102A- has a green LED integrated inside the frame which displays the function being performed. The brighter the LED, the higher the charging current.
It is not possible to overcharge the Battery -A- due to the integrated electronics.
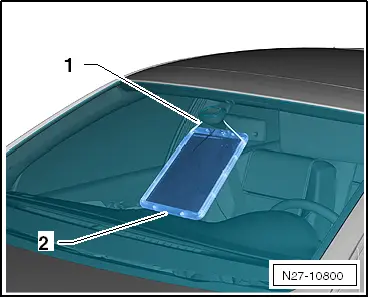
The Solar Battery Maintainer -VAS6102A- is secured on the interior rearview mirror -1-. The bottom rests on the instrument panel -2-.
 Note
Note
The Solar Battery Maintainer -VAS6102A- must not touch the instrument panel completely. Only the bottom edge may be used for support. If it touches completely, the color of the instrument panel could change.

Solar Battery Maintainer -VAS610A- Maintenance Charging
Special tools and workshop equipment required
- Solar Battery Maintainer -VAS6102A-
Procedure
- Secure the Solar Battery Maintainer -VAS6102 A- to the interior rearview mirror -1-.
- Lay the bottom on the instrument panel -2-.
 Note
Note
The Solar Battery Maintainer -VAS6102A- must not touch the instrument panel completely. Only the bottom edge may be used for support. If it touches completely, the color of the instrument panel could change.
- Pull the securing string together so that the Solar Battery Maintainer -VAS6102A- is close to the windshield.
- Connect the connector for the Solar Battery Maintainer -VAS6102A- to the vehicle diagnostic connection. Connecting is the same as with Vehicle Diagnostic Tester.
- Check the Solar Battery Maintainer -VAS6102A- functionality. The green LED must come on.
Severely Discharged Batteries
 WARNING
Risk of injury. Follow all warning messages and safety precautions. Refer to → Chapter "Warnings and Safety Precautions".
A Battery -A- is designated as "severely discharged" if the resting voltage is less than 11.6 V.
 WARNING
Do not check or charge a Battery -A- when the visual indicator has "no color or is bright yellow". Jump starting must not be used!
There is a risk of explosion during testing, charging or jump starting.
These Batteries -A- must be replaced.
 Caution
- Severely discharged Batteries -A- freeze earlier.
- Batteries -A- that have frozen must no longer be used.
 Note
Note
- Batteries -A- that have not been used for a long time will discharge by themselves.
- In severely discharged Batteries -A-, the electrolyte consists almost completely of water, because the acid portion has been greatly reduced.
- Severely discharged Batteries -A- become sulfated, meaning all of the plate surfaces of the Batteries -A- harden.
- The sulfation process may be reversed if a severely discharged Battery -A- is recharged immediately.
- If the Battery -A- is not recharged, the plates will continue to harden, and the ability to accept a charge will decrease. This results in reduction of battery performance.
- Severely discharged Batteries -A- in vehicles must be replaced prior to delivery. Pre-existing damage cannot be ruled out.
Procedure
- Check the Battery -A- resting voltage. Refer to → Chapter "Battery, Charging".
- Charge the Battery -A-:
- Battery Charger -VAS5095A-. Refer to → Chapter "Severely Discharged Battery, Charging with Battery Charger -VAS5095A-".
- Battery Charger -VAS5900-. Refer to → Chapter "Severely Discharged Battery, Charging with Battery Charger -VAS5900-".
- Battery Charger -VAS5903-. Refer to → Chapter "Severely Discharged Battery, Charging with Battery Charger -VAS5903-".
- Battery Charger -VAS5906-. Refer to → Chapter "Battery, Charging with Battery Charger -VAS5906-".
READ NEXT:
 Generator, Checking
Perform Generator Test
Vehicle Diagnostic Tester is attached.
- Select the Diagnostic mode and
start the diagnostics.
- Select the tab Test Plan.
- Select Select Individual Tests
Overview - Generator, Valeo through MY 2000
1 - Generator
2 - Voltage Regulator
Removing:
Remove the nuts -5- and the cover
-4-.
Remove the bolt -6- and the nuts
-7- and remove the voltage regulator.
C
Voltage Regulator, Valeo Generator from 2001, Removing and Installing
Removing
- Remove the generator. Refer to
→ Electrical Equipment; Rep. Gr.27; Generator; Generator,
Removing and Installing.
- Press the cover on the rear side of the
SEE MORE:
Chip Card Reader Control Module, Removing and Installing
The Chip Card Reader Control Module -J676--1-
is located inside the glove compartment
-2-.
Removing
- Turn off the ignition and all electrical equipment and
remove the ignition key.
- Remove the glove compartment. Refer to
→ Body Interior; Rep. Gr.68; Storage Co
Driving with a trailer
General information
Your vehicle is primarily intended for transporting
people and luggage. However, if you drive
with a trailer, follow the technical requirements,
the operation and driving tips, and the legal regulations.
Driving with a trailer affects the vehicle's energy
usage, performance, and
