Audi Q3: Horn
Overview - Horn
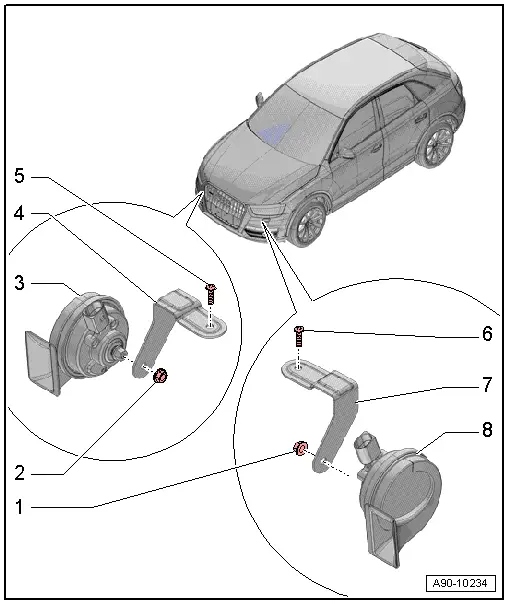
1 - Nut
- 9 Nm
2 - Nut
- 9 Nm
3 - Low Tone Horn -H7-
- Removing and installing. Refer to → Chapter "High Tone Horn -H2-/Low Tone Horn -H7-, Removing and Installing".
4 - Bracket
- For the right horn
5 - Bolt
- 20 Nm
6 - Bolt
- 20 Nm
7 - Bracket
- For the left horn
8 - High Tone Horn -H2-
- Removing and installing. Refer to → Chapter "High Tone Horn -H2-/Low Tone Horn -H7-, Removing and Installing".
High Tone Horn -H2-/Low Tone Horn -H7-, Removing and Installing
High/Low Tone -H2-/-H7-, Removing and Installing, through MY 2014
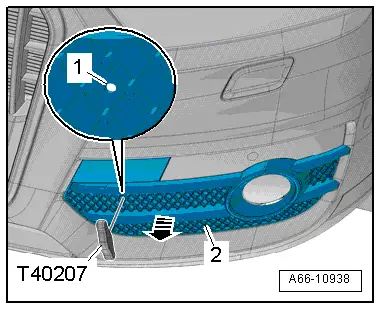
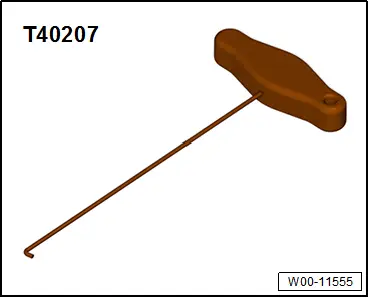
Special tools and workshop equipment required
- Hook Tool -T40207-
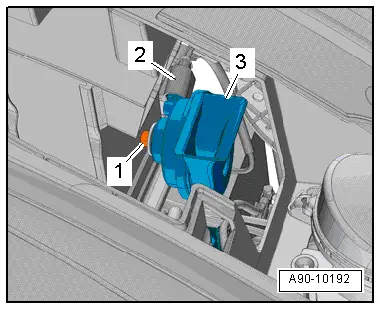
Removing
- Insert the Hook Tool -T40207- in the opening -1- and remove the lower air intake grille -2- from the bumper cover in direction of -arrow-.
- Remove the nut -1-.
- Remove the horn -3- from the bracket.
- Disconnect the connector -2-.
Installing
Install in reverse order of removal.
High/Low Tone -H2-/-H7-, Removing and Installing, from MY 2015
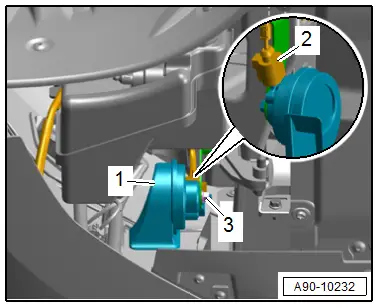
Removing
- Remove the wheel spoiler. Refer to → Body Exterior; Rep. Gr.66; Wheel Housing Liner; Front Wheel Housing Liner, Removing and Installing.
- Remove the nut -3-.
- Remove the horn -1- from the bracket.
- Disconnect the connector -2-.
Installing
Install in reverse order of removal.
Special Tools
Special tools and workshop equipment required
- Hook Tool -T40207-
READ NEXT:
 Windshield Wiper System
Overview - Windshield Wiper System
Overview - Windshield Wiper System
1 - Bolt
Tightening sequence. Refer to → Fig. " Windshield Wiper
Motor -V- - Tightening Specification
Windshield Wiper Arms, Removing and Installing
Special tools and workshop equipment
required
Puller - Wiper Arm Kit -T10369-
Removing
Note
If the windshield wiper motor is to be run during the work
procedure, the hood must be
SEE MORE:
Rear Lid Lock Cylinder Unlock Button -F248-, Removing and Installing
Removing
- Remove the rear lid trim panel. Refer to
→ Body Interior; Rep. Gr.70; Luggage Compartment Trim Panels;
Rear Lid Lower Trim Panel, Removing and Installing.
- Disconnect the connectors -2 and 4-
and the antenna wire -1-.
- Free up the wiring harness -
Audi drive select
Introduction
Applies to: vehicles with Audi drive select
Drive select makes it possible to experience different
types of vehicle characteristics in one vehicle.
With different driving modes, the driver can
switch the setting, for example from sporty to
comfortable. This allows you to adjust the set
