Audi Q3: Steering Gear
Overview - Steering Gear
Part 1
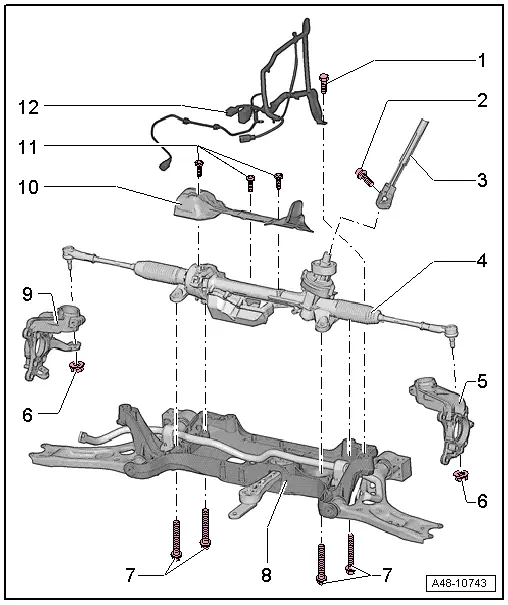
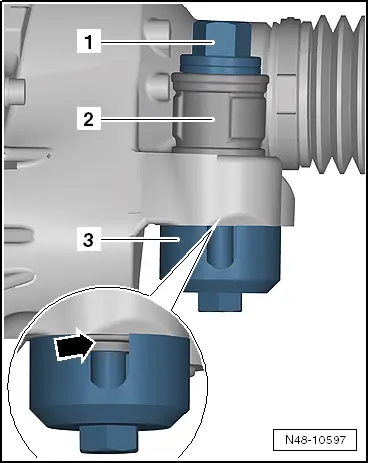
1 - Bolt
- 6 Nm
- For securing the wire
2 - Bolt
- Tightening specification: -item 9-
- Always replace if removed
- Clean the threaded hole (for example, using a thread tap) before installing the new bolt.
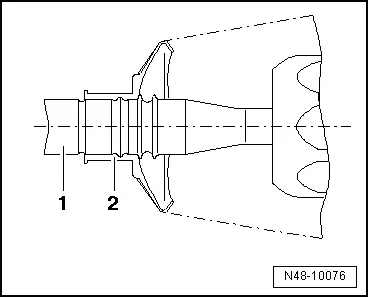
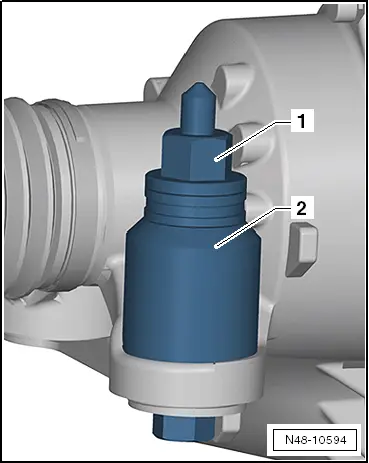
3 - Steering Shaft with Universal Joint
4 - Power Steering Gear
- with Power Steering Control Module -J500-
- Can be checked in "Guided Fault Finding" using the Vehicle Diagnosis Tester.
- Removing and installing. Refer to → Chapter "Steering Gear, Removing and Installing".
- Coat the seal on the steering gear with lubricant such as soft soap before installing.
- After placing steering gear onto universal joint, make sure that seal on steering gear makes contact on assembly plate without kinks and opening to footwell is correctly sealed. Ingress of water and/or noises may be the result.
5 - Left Wheel Bearing Housing
6 - Nut
- 50 Nm
- Always replace if removed
7 - Bolt
- 50 Nm + 90º
- Always replace if removed
8 - Subframe
9 - Right Wheel Bearing Housing
10 - Heat Shield
- There are different versions depending the engine
11 - Bolt
- 6 Nm
12 - Wire
Part 2
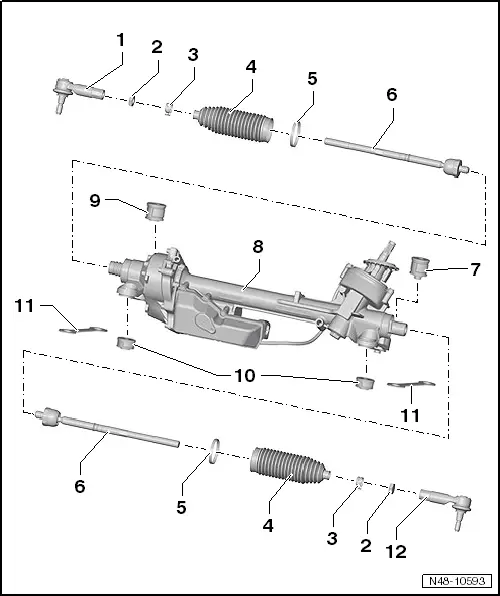
1 - Right Tie Rod End
- Check dust caps for damage and correct seating
2 - Nut
- 70 Nm
- Nut must be counterheld on tie rod end using a wrench when loosening and tightening.
3 - Spring Clamp
4 - Boot
- Check for damage
- Must not be twisted after toe is adjusted
- Removing and installing. Refer to → Chapter "Boot, Removing and Installing".
5 - Clamp
- Always replace if removed
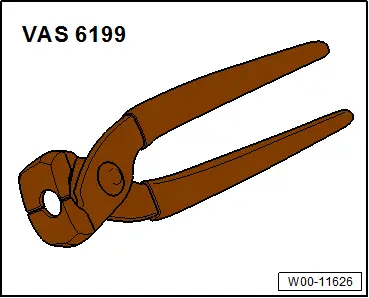
- Install new clamp using Locking Pliers -VAS6199-.
6 - Tie Rod
- 100 Nm
- If faulty, replace with tie rod end
- Removing and installing. Refer to → Chapter "Tie Rod, Removing and Installing".
7 - Long Bonded Rubber Bushing
- Left, rear with centering
- For allocation. Refer to the Parts Catalog.
- Replacing. Refer to → Chapter "Steering Gear, Servicing".
8 - Steering Gear Housing
9 - Long Bonded Rubber Bushing
- Rear right
- For allocation. Refer to the Parts Catalog.
- Replacing. Refer to → Chapter "Steering Gear, Servicing".
10 - Short Bonded Rubber Bushing
- Left and right front
- For allocation. Refer to the Parts Catalog.
- Replacing. Refer to → Chapter "Steering Gear, Servicing".
11 - Locking Plate
12 - Left Tie Rod End
- Check dust caps for damage and correct seating
Steering Gear, Removing and Installing
Special tools and workshop equipment required
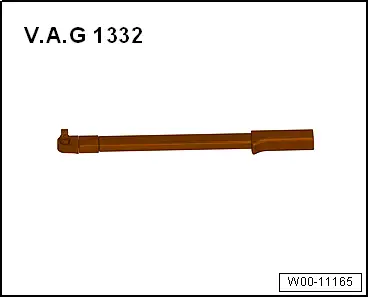
- Torque Wrench 1332 40-200Nm -VAG1332-
Removing
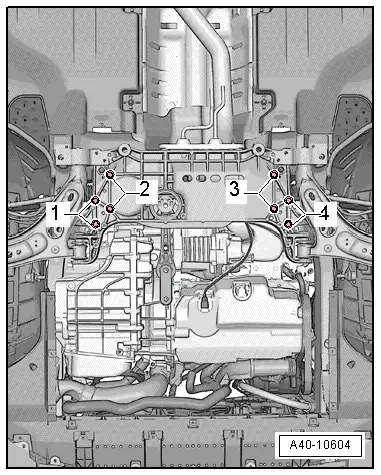
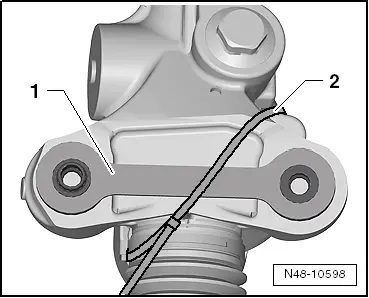
- Remove the subframe with the steering gear. Refer to → Chapter "Subframe with Steering Gear, Removing and Installing".
- Remove the steering gear bolts -2- and -3-.
- Remove the stabilizer bar bolts -1- and -4-.
 Note
Note
Shown in the illustration with the subframe installed.
- First remove the stabilizer bar from the subframe and then from the steering gear.
Installing
Install in reverse order of removal. Note the following:
The steering gear threaded sleeves must be seated in the subframe holes.
 Note
Note
Make sure the ball joint boot is not damaged or twisted.
- Install the subframe with the steering gear. Refer to → Chapter "Subframe with Steering Gear, Removing and Installing".
After installation, position of steering wheel must be checked with a road test.
Perform an axle alignment if the steering wheel is crooked or if new steering gear was installed → Chapter "Axle Alignment Procedure".
- Calibrate the Steering Angle Sensor -G85- using the Vehicle Diagnostic Tester. Refer to → Chapter "Axle Alignment Information".
- If new steering gear was installed, the Power Steering Control Module -J500- must be adapted using the Vehicle Diagnostic Tester.
Boot, Removing and Installing
Special tools and workshop equipment required
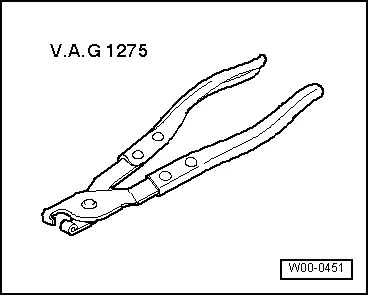
- Hose Clip Pliers -VAG1275A-
- Torque Wrench 1332 40-200Nm -VAG1332-
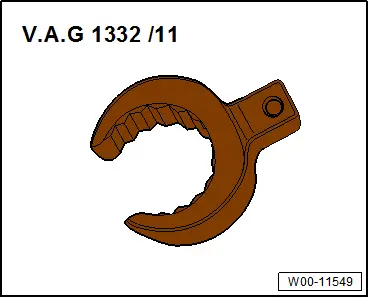
- Torque Wrench 1332 Insert - Open Ring Wrench - 24mm -VAG1332/11-
- Locking Pliers -VAS6199-
Removing
 Note
Note
If the boot is faulty, moisture and dirt will penetrate into steering gear. There must be a noticeable grease film present on steering rack in area of splines. If grease film is not present, steering gear must be replaced. Steering gear must also be replaced if there is corrosion or steering gear is damaged or worn out.
- Turn steering wheel into straight ahead position.
- Remove the front wheel. Refer to → Chapter "Wheels and Tires".
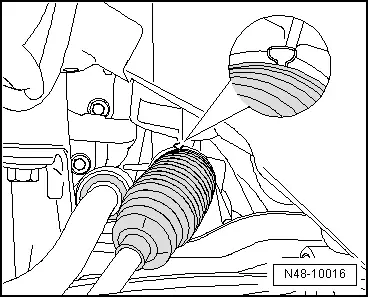
- Clean outside of steering gear in area of bellows.
- While doing this, no dirt must enter the steering gear through the faulty boot.
- Mark the location of the nut -2- on the tie rod.
- Counterhold the tie rod end -1- and loosen the nut -2-.
- Loosen the spring clamp -item 3-, from the boot using the Hose Clip Pliers -VAG1275A- and slide onto the tie rod.
- Remove the clamp -item 5-, and pull the boot off of steering gear housing.
- Now twist tie rod out of tie rod end.
- Pull off the boot with spring clamp from tie rod.

 Note
Note
- If corrosion, damage, wear-out or first signs of soiling on steering rack can be seen, complete steering gear must be replaced.
- If no grease film is visible on steering rack, steering gear must also be replaced completely.
Installing
 Caution
Do not lubricate the steering rack.
- Turn steering wheel into straight ahead position.
- Guide new clamp and boot onto tie rod.
- Install the tie rod up to the marking made during removal.
- Tighten the lock nut -2- to tightening specification, while counterholding on tie rod end -1-.
- Lightly grease the sealing surface of the boot to the tie rod with grease from the repair kit.

- Slide the boot -2- onto tie rod -1- as depicted in the illustration.
- Secure spring clamp on boot using Hose Clip Pliers -VAG1275A-.
- Lightly grease the sealing surface of the boot to the steering gear housing with grease from the repair kit.

- Slide the boot onto steering gear housing.
- Tighten new clamp using Locking Pliers -VAS6199- to the extent depicted in the illustration.
Install in reverse order of removal.
- Install the front wheel. Refer to → Chapter "Wheels and Tires".
- Perform vehicle alignment. Refer to → Chapter "Axle Alignment Procedure".
- Perform the basic setting for the Steering Angle Sensor -G85- on the Vehicle Diagnosis Tester in "Guided Fault Finding".
- Then perform the basic setting for the steering on the Vehicle Diagnosis Tester in "Guided Fault Finding".
Tie Rod, Removing and Installing
Special tools and workshop equipment required
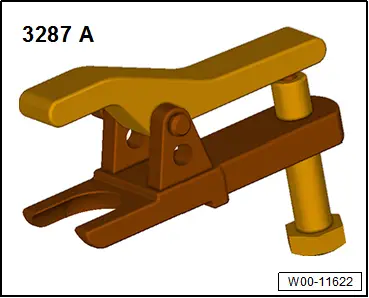
- Puller - Ball Joint -3287A-
- Hose Clip Pliers -VAG1275A-
- Torque Wrench 1332 40-200Nm -VAG1332-
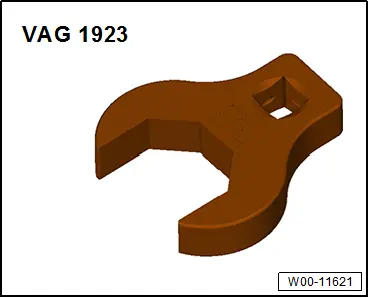
- Torque Wrench Insert - Open Jaw -VAG1923-
- Locking Pliers -VAS6199-
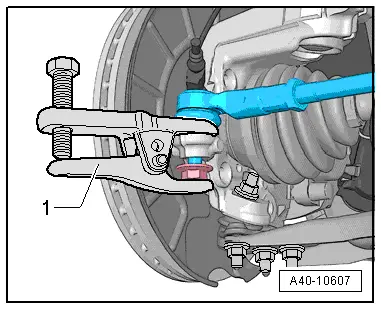
Removing Tie Rod
- Turn steering wheel into straight ahead position.
- Remove the front wheel. Refer to → Chapter "Wheels and Tires".
- Clean outside of steering gear in area of bellows.
- Counterhold the tie rod end -1- and loosen the nut -2-.

- Loosen the nut of the tie rod end, but do not remove yet.
- To protect thread, screw nut on pin a few turns.
- Press off tie rod end from wheel bearing housing with Puller - Ball Joint -328 A--1- and then remove nut.
- Loosen the spring clamp -1- from the boot using the Hose Clip Pliers -VAG1275A- and slide onto the tie rod.
- Remove clamp and pull the boot off of steering gear housing.
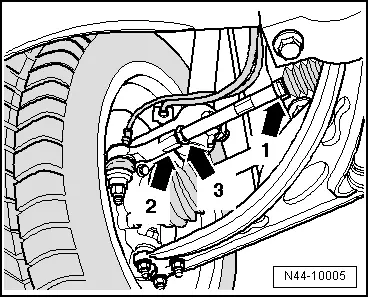
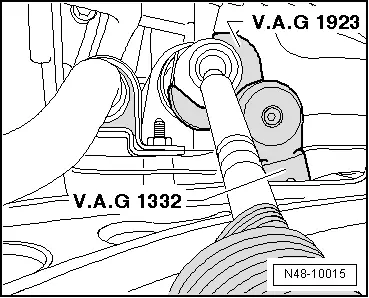
- Remove the tie rod from steering gear using Torque Wrench Insert - Open Jaw -VAG1923-.
 Note
Note
- If corrosion, damage, wear-out or first signs of soiling on steering rack can be seen, complete steering gear must be replaced.
- If no grease film is visible on steering rack, steering gear must also be replaced completely.
Installing Tie Rod
 Caution
Do not lubricate the steering rack.
- Turn steering wheel into straight ahead position.
- Guide new clamp and boot onto tie rod.
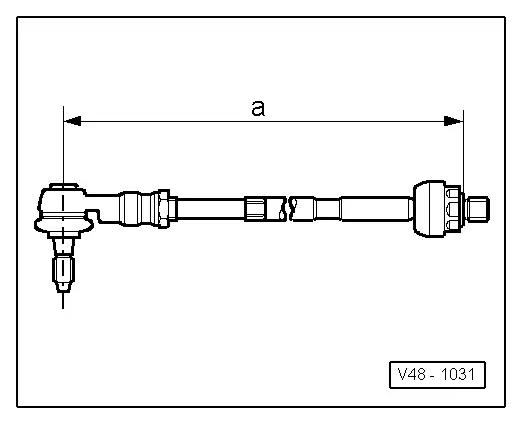
- Twist tie rod far enough into tie rod end until dimension -a- is obtained.
Dimension -a- = 367 +- 1 mm
- Twist tie rod into steering gear and tighten to tightening specification.
- Lightly grease the sealing surface of the boot to the tie rod with grease from the repair kit.
- Slide bellows -2- onto tie rod -1-, pay attention to correct position when doing this.
- Lightly grease the sealing surface of the boot to the steering gear housing with grease from the repair kit.
- Slide boot onto steering gear housing until it stops.
- Tighten new clamp using Locking Pliers -VAS6199- to the extent depicted in the illustration.
Install in reverse order of removal.
- Remove the front wheel. Refer to → Chapter "Wheels and Tires".
- Perform vehicle alignment. Refer to → Chapter "Axle Alignment Procedure".
- Perform the basic setting for the Steering Angle Sensor -G85- using the Vehicle Diagnosis Tester.
- Perform a basic setting to the steering using the Vehicle Diagnosis Tester.

Steering Gear, Servicing
Special tools and workshop equipment required
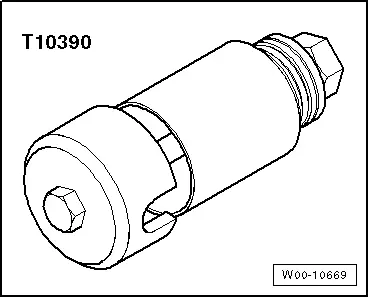
- PAS Housing Mount Assembly Tool -T10390-
Removing
 Note
Note
- The bonded rubber bushings must always be replaced in pairs on each side.
- The following describes the removal and installation of one bonded rubber bushing. Removing and installing the second bonded rubber bushing is identical.
- Always pay attention to the allocation of the bonded rubber bushings for the power steering gear.
- Remove the power steering gear. Refer to → Chapter "Steering Gear, Removing and Installing".
- Mount the tools as illustrated.
1 - PAS Housing Mount Assembly Tool - Nut -T10390/3-
2 - PAS Housing Mount Assembly Tool - Tube -T10390/1-
- Remove the bonded rubber bushing.
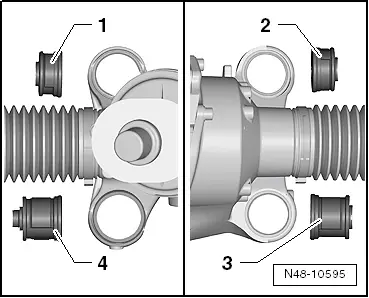
Allocation of the Bonded Rubber Bushings for the Power Steering Gear
1 - Short bonded rubber bushing for left front
2 - Short bonded rubber bushing for right front
3 - Long bonded rubber bushing for right rear
4 - Long bonded rubber bushing for left rear with centering
Installing
- Always pay attention to the allocation of the bonded rubber bushings for the power steering gear.
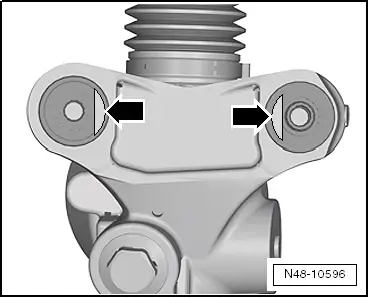
- Coat the outer bonded rubber bushing with soapy water.
- Position the bonded rubber bushing so that the flat side points parallel to the inside -arrows-.
 Note
Note
Always install the bonded rubber bushing from above in the direction of the drive steering shaft.
- Mount the tools as illustrated.
1 - PAS Housing Mount Assembly Tool - Nut -T10390/3-
2 - Bonded rubber bushing
3 - PAS Housing Mount Assembly Tool - Tube -T10390/2-
- Install the bonded rubber bushing all the way in until the rubber lip folds over the edge -arrow-.
 Note
Note
The bonded rubber bushing will move slightly backward after loosening the PAS Housing Mount Assembly Tool -T10390-.
- Mount the plate -1- on the bonded rubber bushing so that the edges and the flat surface interlock.
- Secure the plate -1- with the cable tie -2-.
 Note
Note
Tighten the cable tie secure so that the plate cannot move when the power steering gear is being installed.
- Install the power steering gear. Refer to → Chapter "Steering Gear, Removing and Installing".
- Remove the cable tie from the steering gear.
Special Tools
Special tools and workshop equipment required
- PAS Housing Mount Assembly Tool -T10390-
- Hose Clip Pliers -VAG1275A-
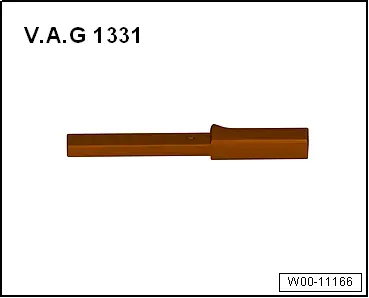
- Torque Wrench 1331 5-50Nm -VAG1331-
- Torque Wrench 1332 40-200Nm -VAG1332-
- Open Ring Wrench - 24mm -VAG1332/11-
- Torque Wrench Insert - Open Jaw -VAG1923-
- Locking Pliers -VAS6199-
- Puller - Ball Joint -3287A-
Edition: A005A001021 - LU - 02/20/2015 - TMP.
READ NEXT:
 Wheel and Tire Guide
Audi Q3, Type 8U
This is the Wheel and Tire Guide for the Following Model:
"Audi Q3 / RS Q3".
Play Close Attention to the corresponding Notes and Cautions As Well As the
Comments in the Document.
Towing Guide
Towing Guide
Note
This is a "guide" for Audi models and their towing weights.
The proper towing weight of the respective vehicle must
always adhere to the corresponding vehicle docum
SEE MORE:
Current Draw Test
WARNING
Do not check or charge a Battery -A- when the visual
indicator has "no color or is
bright yellow". Jump starting must not be used!
There is a risk of explosion during testing,
charging or jump starting.
These Batteries -A- must be replaced.
Make sure the correct charging
Air Distribution Housing, Removing and Installing
Removing
- Remove the Air Conditioning (A/C) unit (heater). Refer to
→ Chapter "Heater and A/C Unit, Removing and Installing".
- Remove the bolts -arrows-.
- Remove the heater core cover -1-.
- Remove the bolts -A-.
- Remove the clamps -B-.
- Remove the
