Audi Q3: Brake Pedal
Overview - Brake Pedal
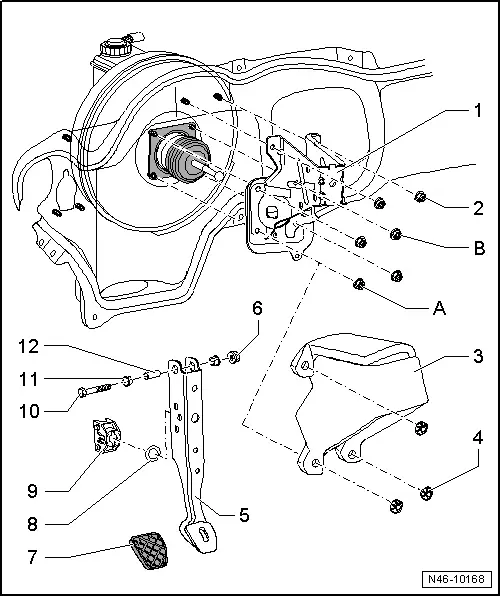
1 - Mounting Bracket
- Removing and installing, refer to → Chapter "Mounting Bracket, Removing and Installing".
2 - Nut
- 25 Nm
- Always replace if removed
- Self-locking
- First tighten the nuts -A and B-
3 - Noise Insulation
- On brake pedal
4 - Lock Washer
5 - Brake Pedal
- Removing and installing, refer to → Chapter "Brake Pedal, Removing and Installing".
- Brake pedal and brake booster, disconnecting, refer to → Chapter "Brake Pedal, Removing from Brake Booster".
- Brake pedal to brake booster, connecting, refer to → Chapter "Brake Pedal, Attaching to Brake Booster".
 WARNING
The path of the brake pedal must not be shortened via extra floor mats.
6 - Nut
- 25 Nm
- Always replace if removed
- Self-locking
7 - Cover
8 - Bearing Shell
9 - Mount
- For the ball head on the brake booster push rod
10 - Bolt
11 - Bearing Bushing
12 - Mounting Pin
Mounting Bracket, Removing and Installing
Removing
- Remove the brake pedal, refer to → Chapter "Brake Pedal, Removing and Installing".
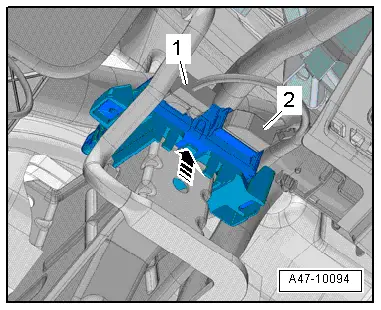
- Disconnect the connectors -1 and 2- and free up the wires.
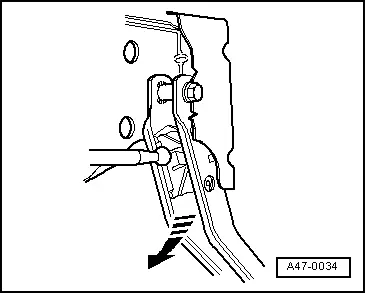
- Release the catch -arrow- and remove the Data Bus On Board Diagnostic Interface -J533- toward the rear.
- Remove the noise insulation on the brake pedal.
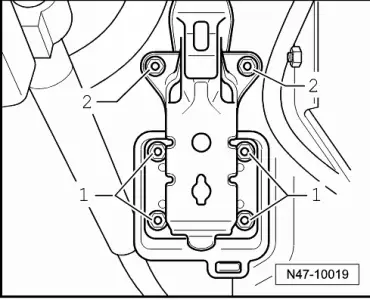
- Remove the nuts -1 and 2- and remove the mounting bracket.
Installing
Install in reverse order of removal. Note the following:
- Install the brake pedal, refer to → Chapter "Brake Pedal, Removing and Installing".
 WARNING
Risk of accident!
Make sure the brakes are working correctly before driving the vehicle.
Brake Pedal, Removing from Brake Booster
Special tools and workshop equipment required
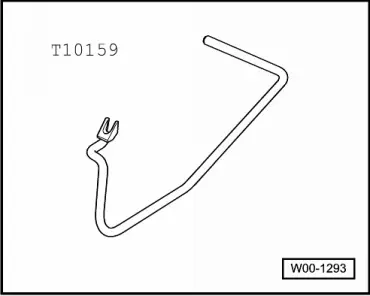
- Brake Servo Release Tool -T10159A-
Procedure
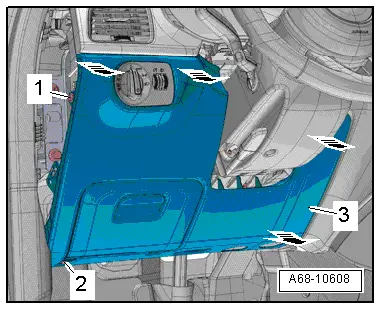
- Remove the driver side instrument panel cover, refer to → Body Interior; Rep. Gr.68; Storage Compartments and Covers; Driver Side Instrument Panel Cover, Removing and Installing.
- First press brake pedal in direction of brake booster and hold.
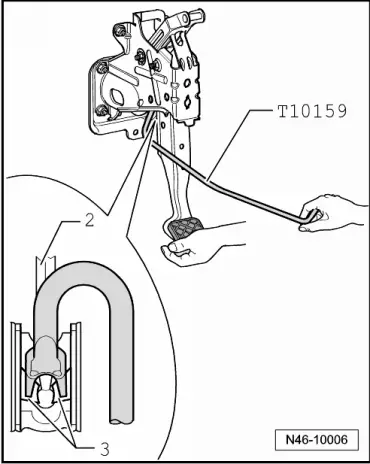
- Insert the Brake Servo Release Tool -T10159A- and pull in the direction of the driver seat while counterholding at the brake pedal so that it does not move backward. While doing this, the mount tabs -3- will be pushed out of the push rod ball head -2-.
 Note
Note
The illustration shows the installation position with the pedal assembly removed.
- Pull the Brake Servo Release Tool -T10159A- and brake pedal together toward the driver seat. As a result, the brake pedal is removed from the push rod ball head.
Brake Pedal, Attaching to Brake Booster
Procedure
- Hold the push rod ball head in front of the mount and push the brake pedal toward the brake booster until the ball head engages audibly.
- Install the driver side instrument panel cover, refer to → Body Interior; Rep. Gr.68; Storage Compartments and Covers; Driver Side Instrument Panel Cover, Removing and Installing.
Brake Pedal, Removing and Installing
Removing
- Disconnect the brake pedal from brake booster, refer to → Chapter "Brake Pedal, Removing from Brake Booster".
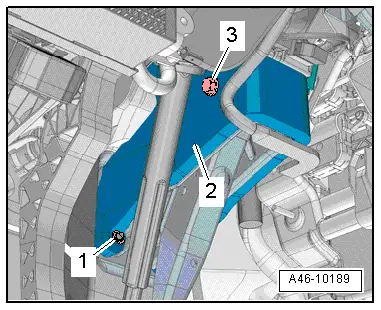
- Remove the lock washer -1- and push the noise insulation -2- to the side.
- Remove the bolt -3- and remove the brake pedal.
Installing
Install in reverse order of removal. Note the following:
 Note
Note
Grease the bearing areas with Polycarbamide Grease -G 052 142 A2- before assembling.
- Attach the brake pedal to the brake booster, refer to → Chapter "Brake Pedal, Attaching to Brake Booster".
Special Tools
Special tools and workshop equipment required
- Piston Resetting Tool -T10145-

- Brake Servo Release Tool -T10159A-
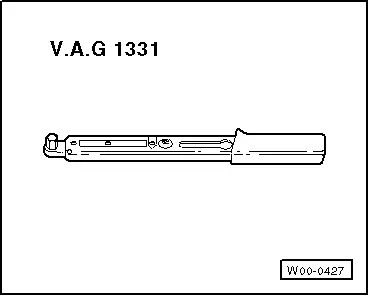
- Torque Wrench 1331 5-50Nm -VAG1331-
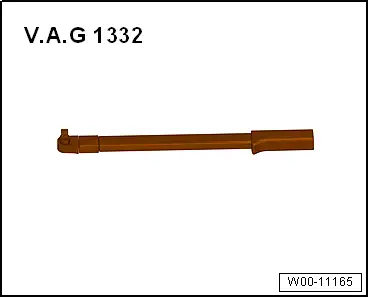
- Torque Wrench 1332 40-200Nm -VAG1332-
- Brake Pedal Actuator -VAG1869/2-.

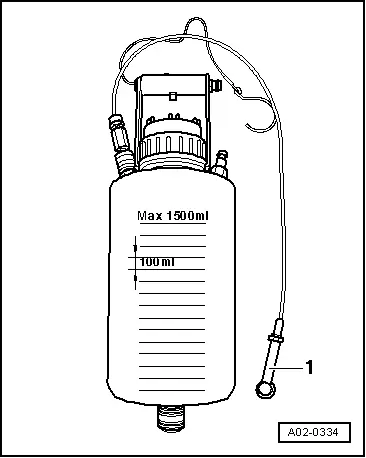
- Container -1- from the Brake Charger/Bleeder Unit -VAS5234-
READ NEXT:
 Overview - Front Brake Caliper
Overview - Front Brake Caliper, Single-Piston Brake
1 - Protective Cap
Place on the bleed screw
2 - Bleeder Screw
10 Nm
Before installing, lightly coat the thr
Brake Caliper Piston, Removing and Installing
Brake Caliper Piston, Removing and Installing, Single-Piston Brake
Special tools and workshop equipment
required
Trim Removal Wedge -3409-
Piston Resetting Tool -T10145-
Piston Resetting To
SEE MORE:
Subframe, Removing and Installing
Subframe, Removing and installing, FWD Vehicles
Special tools and workshop equipment
required
Locating Pins -T10096-
Torque Wrench 1332 40-200Nm -VAG1332-
Engine and Gearbox Jack -VAS6931-
Removing the Subframe and Attachments
- Disconnect the right and left electromechanical par
Side Wall Lettering
Example: Dunlop SP Sport 9000
1 - Size Designation (215/55 ZR16)
Label on PAX tires. Refer to
→ Chapter "Run-Flat Tire (PAX), Labeling On Sidewall"
2 - Manufacturer (Trade Name)
3 - Tread Designation
4 - Label for Tubeless Tires
5 -&
