Audi Q3: Drive Axle Threaded Connection, Loosening and Tightening
Special tools and workshop equipment required
- Socket AF 24 mm -T10361A-
- Digital Torque Wrench -VAG1756A-
The wheel bearing must not be under a load while the drive axle threaded connection on the wheel side is loose.
If the bearings are loaded by the vehicle weight the wheel bearing will be damaged. This reduces the service life of the wheel bearings. Observe the following when doing so:
- Procedure for loosening the twelve-point bolt.
Vehicles without a drive axle must not be moved, otherwise the wheel bearing will be damaged. If the vehicle must be moved, be sure to note the following:
- Install an outer joint in place of the drive axle.
- Tighten the outer joint to 200 Nm.
Loosening the twelve-point bolt
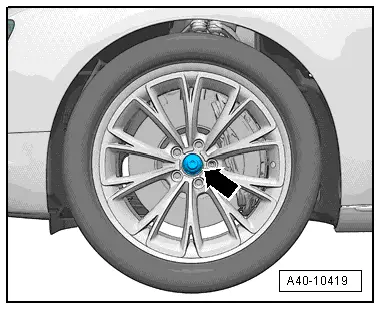
- With vehicle still resting on wheels, loosen the twelve-point bolt -arrow- with Socket AF 24 mm -T10361A- maximum 90º, otherwise, the wheel bearing will be damaged.
- Lift the vehicle just enough so that the wheels are hanging free.
- Apply the brakes (a second technician required).
- Remove the twelve-point bolt -arrow-.
 Note
Note
Before installing, clean the threads in the CV joint with a tap.
Twelve-point bolt, fastening
- Replace the twelve-point bolt.
 Note
Note
Wheels must not yet touch the ground to tighten the drive axle, wheel bearing may otherwise be damaged.
- Apply the brakes (a second technician required).
- Tighten the twelve-point bolt to 200 Nm.
- Lower the vehicle onto the wheels.
- Turn the twelve-point bolt an additional 180º.
Drive Axle Heat Shield, Removing and Installing
Removing
FWD Vehicles
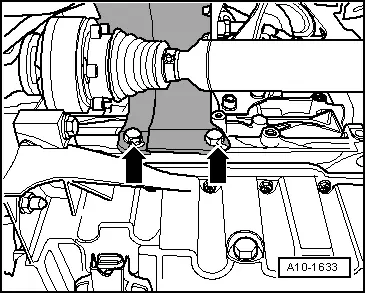
- Remove the nuts -arrows- and then remove the heat shield.
AWD Vehicles Version 1:
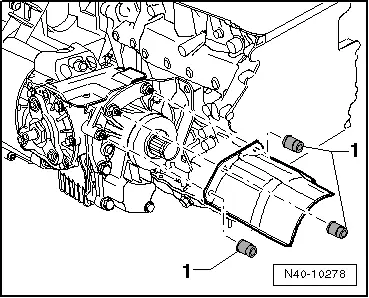
- Remove the nuts -1- and then remove the heat shield.
AWD Vehicles Version 2:
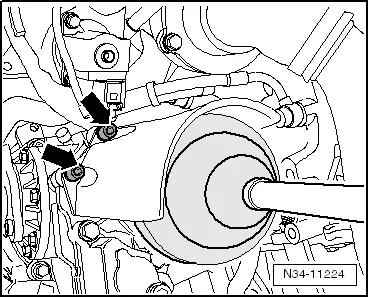
- Remove the nuts -arrows- and then remove the heat shield.
Installing
Install in reverse order of removal.
READ NEXT:
 CV Joint, Servicing, Drive Axle with CV Joint VL107
Special tools and workshop equipment
required
Clamping Pliers -VAG1682A-
Circlip Pliers -VW161A-
Press Plate -VW401-
Press Plate -VW402-
Press Piece - Rod -VW408A-
CV Joint Press Sleev
CV Joint, Servicing, Drive Axle with Triple Roller Joint AAR3300i, Mounted
in Transmission
Special tools and workshop equipment
required
Tripod Joint Tool -T10065-
Puller - Driveshaft -T10382-
Hose Clip Pliers -VAG1275A-
Torque Wrench 1331 5-50Nm -VAG1331-
Torque Wrench 1332 4
CV Joint, Servicing, Drive Axle with Triple Roller Joint AAR3300i, Mounted
on Transmission Stub Shaft
Special tools and workshop equipment
required
Tripod Joint Tool -T10065-
Puller - Driveshaft -T10382-
Hose Clip Pliers -VAG1275A-
Torque Wrench 1331 5-50Nm -VAG1331-
Torque Wrench 1332 4SEE MORE:
Safety belts
General information
Each seat is equipped with a three-point safety
belt. Safety belts that are worn correctly are the
most effective way to reduce the risk of serious or
fatal injuries in a collision. Therefore, wear your
safety belt correctly and make sure that all vehicle
passengers are also wear
Options and settings
Options
Context-dependent functions and settings may
be available depending on vehicle equipment, the
selected source, the connected mobile device,
and the connection type.
Requirement: the playback view must be displayed
1 fig. 141.
Press More 11.
Play more like this
The track currently playin