Audi Q3: Outer CV Joint, Checking
It is necessary to disassemble the joint whenever replacing the grease or if the ball surfaces show wear or damage.
Removing
- Before disassembling mark ball hub position in relation to the ball cage and housing with an electric scriber or oil stone -arrow-.
- Tilt ball hub and ball cage and remove balls one after another.
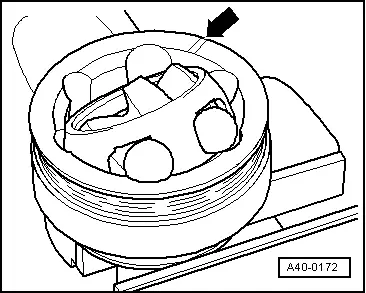
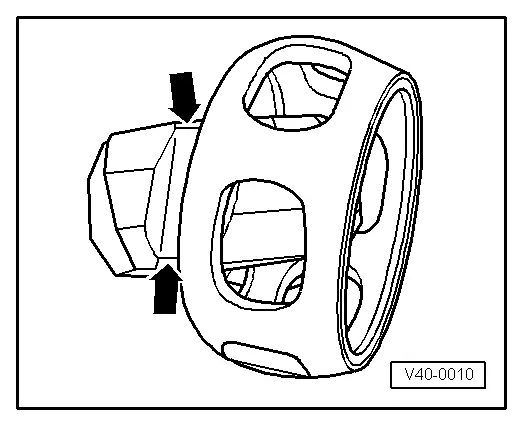
- Turn cage until two cage windows -arrow- rest on joint body.
- Lift out cage with hub.
- Swing a hub segment in a cage window.
- Fold hub out from cage.
 Note
Note
- The balls of each joint belong to one tolerance group. Check stub axle, hub, cage and balls for small depressions (pitting build-up) and chafing.
- Excessive circumferential backlash in joint makes itself noticed via tip-in shock, in such cases joint should be replaced.
- Flattening and running marks of balls are no reason to replace joint.
Installing
Installation is reverse of removal, noting the following:
- Insert cage with hub into joint body.
 Note
Note
Cage must be installed laterally correct.
- Press in opposing balls in sequence, during this, previous position of ball hub to ball cage and to joint body must be established again.
- Install new circlip in shaft.
Inner CV Joint, Checking
It is necessary to disassemble the joint whenever replacing the grease or if the ball surfaces show wear or damage.
 Note
Note
Ball hub and joint piece are paired. Before removing, mark in relation to each other using a waterproof felt-tip pen.
Removing
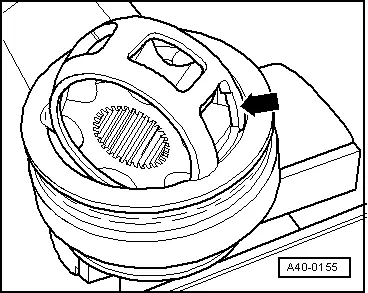
- Swivel the ball hub and ball cage.
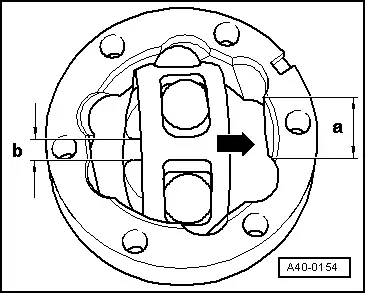
- Remove the joint in the direction of the arrow.
- Remove the balls from the cage.
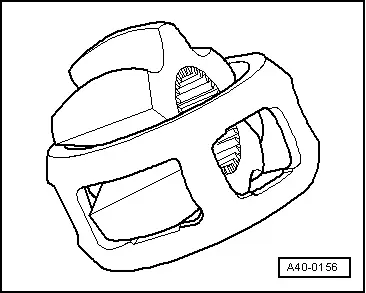
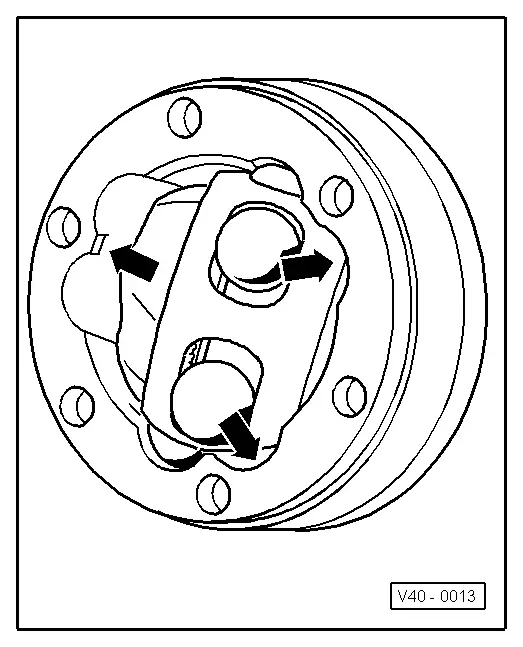
- Flip out ball hub from ball cage via running path of ball -arrows-.
- Check joint piece, ball hub, ball cage and balls for small broken off depressions (pitting build-up) and chafing.
 Note
Note
Excessive backlash in joint will be noticed as a knock during load changes. Joint must be replaced in such cases. Flattening and running marks of balls are no reason to replace joint.
Installing
Installation is reverse of removal, noting the following:
- Insert ball hub into ball cage via two chamfers. The installation position is at random. Press balls into cage.
- Insert hub with cage and balls upright into joint piece.

 Note
Note
- When inserting, make sure that in each case the wide gap -a- at joint piece contacts narrow gap -b- at hub after swinging in.
- Chamfer on inner diameter of ball hub (splines) must face large diameter of joint piece.
- Use the felt-tip pen markings made during removal to help with installation.
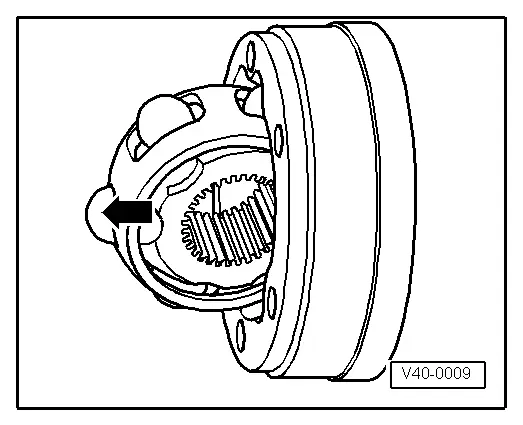
- Swing in ball hub, to do so swing out hub far enough from cage -arrows- so that the balls have the distance of the running paths.
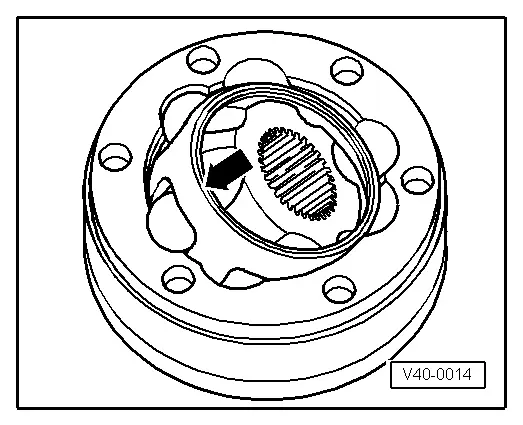
- Swing in hub with balls by pressing forcefully onto cage -arrow-.
CV joint, checking for function:
CV joint is properly assembled, if ball hub can be slid back and forth by hand over whole compensation length.
READ NEXT:
 Special Tools
Special tools and workshop equipment required
Bearing Installer - Wheel Hub/Bearing Kit -T10205-
Torque Wrench 1332 40-200Nm -VAG1332-
Hydraulic Press -VAS6178-
Pneumatic/Hydraulic Foot Pu
Overview - Subframe
Overview - Subframe, Vehicles with FWD
Caution
There is a risk of damaging the subframe threaded
connection threads on the body.
The subframe bolts on the body must not be loosened
SEE MORE:
Front Brake Caliper Balance Weight
Depending on the model for each brake caliper two vibration
dampers are installed.
1 - Bolt
10 Nm
Replace after each removal.
2 - Vibration Damper
Installed 2 on each brake caliper
Removing and installing, refer to
→ Chapter "Damper, Removing and Inst
Text input
Fig. 17 Center display: text input diagram with MMI Navigation plus 1/ MMI
Radio plus 2
Overview
In the input fields of the various menus, you can
enter letters, numbers, and characters, for example
to find a contact in the directory. The text input
display 1 or 2 depends on the vehicle
equipment.
