Audi Q3: Vacuum Pump, Removing and Installing
Vacuum Pump, Removing and Installing, Vehicles with 2.0L TFSI Engine
Removing
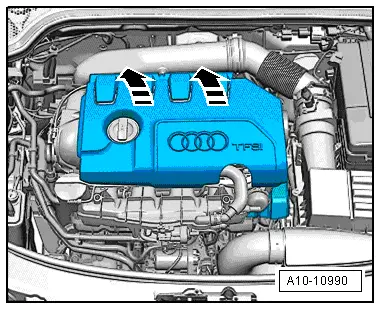
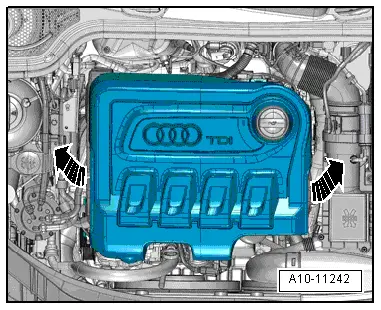
- Remove the engine cover, refer to → Rep. Gr.10; Engine Cover; Engine Cover, Removing and Installing.
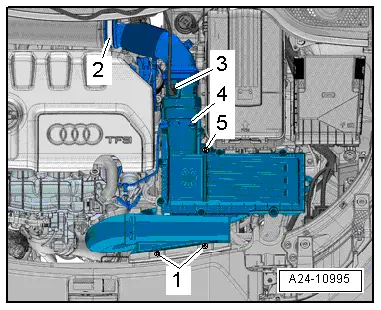
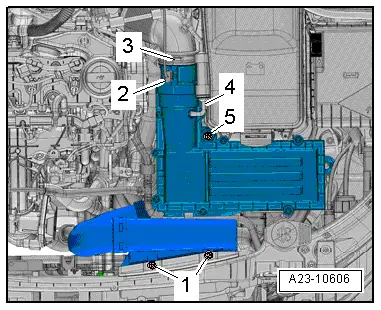
- Remove the air filter housing, refer to → Engine Mechanical, Fuel Injection and Ignition; Rep. Gr.24; Air Filter; Air Filter Housing, Removing and Installing.
- Remove the high pressure pump, refer to → Rep. Gr.24; High Pressure Pump; High Pressure Pump, Removing and Installing.
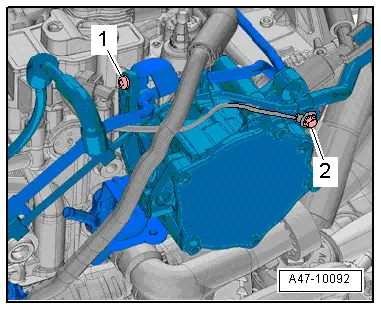
- Remove the bolt -1- for the coolant line and the bolt -2- for the ground cable.
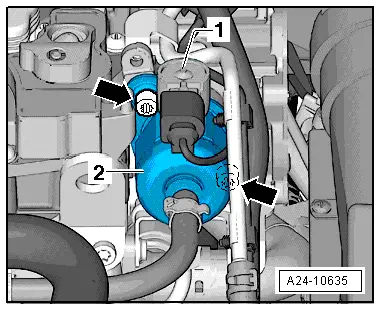
- Remove and free up the vacuum hoses -2- from the vacuum pump -1-.
 Caution
Be careful not to damage the vacuum hoses. Replace the vacuum hose if damaged.
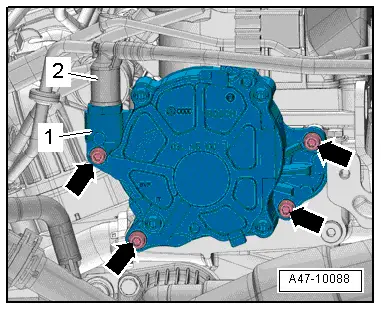
- Remove the bolts -arrows- on the vacuum pump sealing flange.
- Pull the vacuum pump from the mount and remove.
Installing
Install in reverse order of removal. Note the following:
 Note
Note
Replace the seal.
- Make sure the seal is correctly installed.

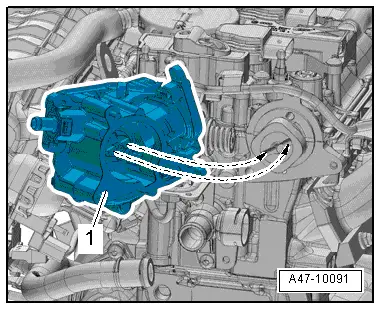
- Turn the vacuum pump yoke -1- so it engages in the groove on the camshaft when positioning the vacuum pump -arrows-.
- Install the engine cover, refer to → Rep. Gr.10; Engine Cover; Engine Cover, Removing and Installing.

Vacuum Pump, Removing and Installing, Vehicles with TDI Engine
Removing
- Remove the engine cover, refer to → Rep. Gr.10; Engine Cover; Engine Cover, Removing and Installing.
- Remove the air filter housing, refer to → Rep. Gr.23; Air Filter; Air Filter Housing, Removing and Installing.
- Remove the vacuum hose -2- upward from the vacuum pump -1-.
- Remove the bolts -arrows- on the vacuum pump sealing flange.
- Pull the vacuum pump from the mount and remove.
Installing
Install in reverse order of removal. Note the following:
 Note
Note
Replace the seal.
- Make sure the seal is correctly installed.
- Turn the vacuum pump yoke -1- so it engages in the groove on the camshaft when positioning the vacuum pump -arrows-.
- Install the engine cover, refer to → Rep. Gr.10; Engine Cover; Engine Cover, Removing and Installing.
READ NEXT:
 Brake Lines
Separating Points
Brake Line on the Underbody
1 - Brake line
2 - Brake hose
3 - Spring
4 - Brake hose bracket
Tightening Specifications
Refer to ite
Hydraulic System
Brake Fluid General Information
Brake fluid is hygroscopic, for example it has the ability
to absorb water and moisture from the air.
If water has been absorbed, the boiling point will drop, for
Special Tools
Special tools and workshop equipment
required
Piston Resetting Tool -T10145-
Piston Resetting Tool - Cap /6 -T10146/6- from Piston
Resetting Tool - Caps /1,/2,/3,/4,/5 -T10146-
SEE MORE:
General Information
ABS Repair Instructions
ABS malfunctions do not affect the brake system and the
booster. Conventional brake system stays operative even without
ABS. A change in braking behavior should be checked. When the
ABS warning lamp comes on the rear wheels can lock-up early when
braking!
Front Brake Caliper Balance Weight
Depending on the model for each brake caliper two vibration
dampers are installed.
1 - Bolt
10 Nm
Replace after each removal.
2 - Vibration Damper
Installed 2 on each brake caliper
Removing and installing, refer to
→ Chapter "Damper, Removing and Inst