Audi Q3: Drive Axle Threaded Connection, Loosening and Tightening
Special tools and workshop equipment required
- Socket AF 24 mm -T10361A-
- Digital Torque Wrench -VAG1756A-
The wheel bearing must not be under a load while the driveshaft threaded connection on the wheel side is loose.
If the bearings are loaded by the vehicle weight the wheel bearing will be damaged. This reduces the service life of the wheel bearings. Therefore observe the following:
- Procedure for loosening the twelve-point bolt.
Vehicles without a driveshaft must not be moved, otherwise the wheel bearing will be damaged. If vehicle does have to be moved, always note the following points:
- Install an outer joint in place of the drive axle.
- Tighten the outer joint to 200 Nm.
Loosening the twelve-point bolt
- With vehicle still resting on wheels, loosen 12-point bolt with Socket AF 24 mm -T10361A- maximum 90º, otherwise, wheel bearing will be damaged.
- Lift the vehicle just enough so that the wheels are hanging free.
- Apply the brakes (a second technician required).
- Remove the twelve-point bolt -arrow-.
Twelve-point bolt, fastening
- Replace the twelve-point bolt.
 Note
Note
Wheels must not yet touch the ground to tighten the drive axle, wheel bearing may otherwise be damaged.
- Apply the brakes (a second technician required).
- Tighten the twelve-point bolt to 200 Nm.
- Lower the vehicle onto its wheels.
- Turn the twelve-point bolt an additional 180º.

Outer CV Joint, Checking
It is necessary to disassemble the joint whenever replacing the grease or if the ball surfaces show wear or damage.
Removing
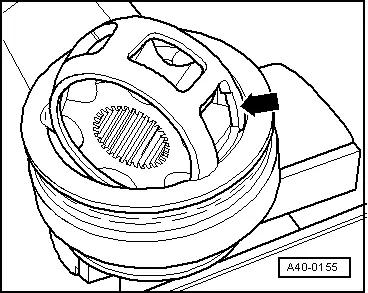
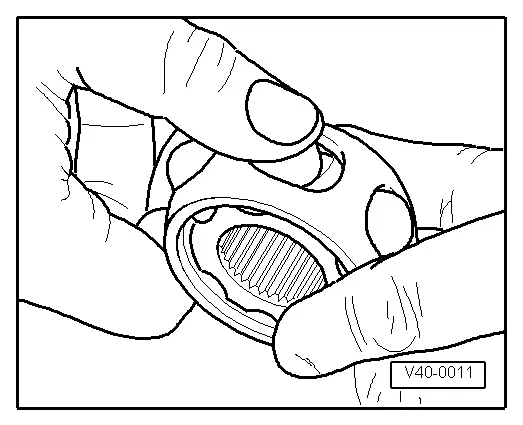
- Before disassembling mark ball hub position in relation to the ball cage and housing with an electric scriber or oil stone -arrow-.
- Tilt ball hub and ball cage and remove balls one after another.

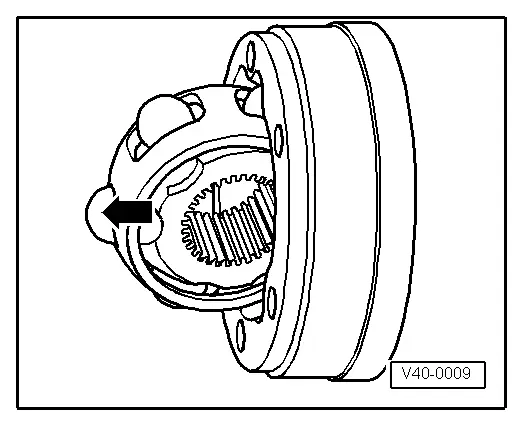
- Turn cage until two cage windows -arrow- rest on joint body.
- Lift out cage with hub.
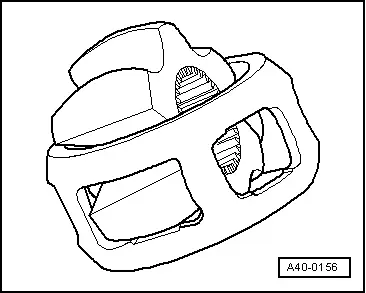
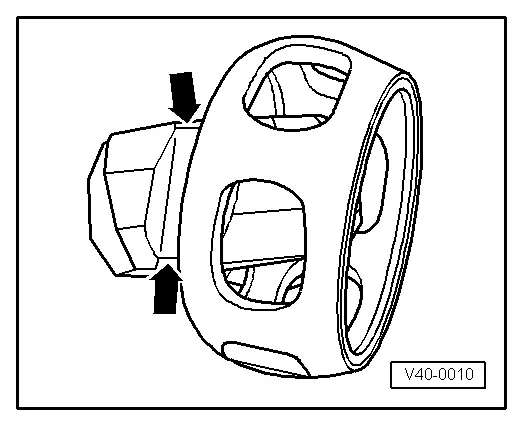
- Swing a hub segment in a cage window.
- Fold hub out from cage.
 Note
Note
- Six balls for each joint belong to a tolerance group. Check stub axle, hub, cage and balls for small depressions (pitting build-up) and chafing.
- Excessive circumferential backlash in joint makes itself noticed via tip-in shock, in such cases joint should be replaced.
- Flattening and running marks of balls are no reason to replace joint.
Installing
Installation is reverse of removal, noting the following:
- Press quantity of grease specified in table.
- Insert cage with hub into joint body.
 Note
Note
Cage must be installed laterally correct.
- Press in opposing balls in sequence, during this, previous position of ball hub to ball cage and to joint body must be established again.
- Install new circlip in shaft.
- Distribute remaining grease in the joint boot.
Inner CV Joint, Checking
It is necessary to disassemble the joint whenever replacing the grease or if the ball surfaces show wear or damage.
 Note
Note
Ball hub and joint piece are paired. Before removing, mark in relation to each other using a waterproof felt-tip pen.
Removing
- Swivel the ball hub and ball cage.
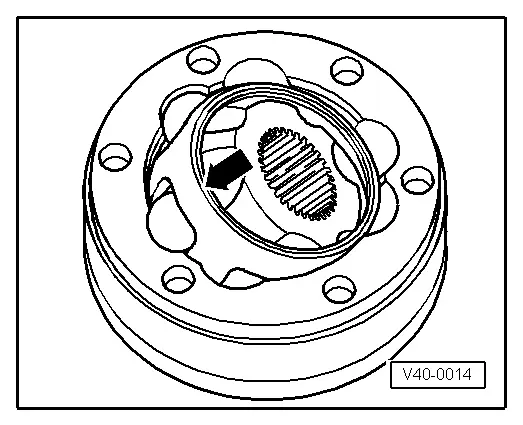
- Remove the joint in the direction of the arrow.
- Remove the balls from the cage.
- Flip out ball hub from ball cage via running path of ball -arrows-.
- Check joint piece, ball hub, ball cage and balls for small broken off depressions (pitting build-up) and chafing.
 Note
Note
Excessive backlash in joint will be noticed as a knock during load changes. Joint must be replaced in such cases. Flattening and running marks of balls are no reason to replace joint.
Installing
Installation is reverse of removal, noting the following:
- Insert ball hub into ball cage via two chamfers. The installation position is at random. Press balls into cage.
- Insert hub with cage and balls upright into joint piece.
 Note
Note
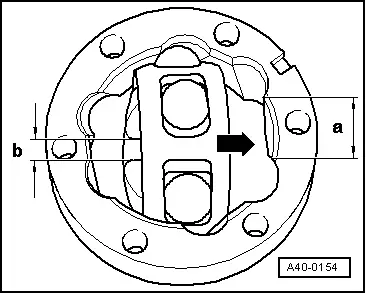
- When inserting, make sure that in each case the wide gap -a- at joint piece contacts narrow gap -b- at hub after swinging in.
- Chamfer on inner diameter of ball hub (splines) must face large diameter of joint piece.
- Use the felt-tip pen markings made during removal to help with installation.
- Swing in ball hub, to do so swing out hub far enough from cage -arrows- so that the balls have the distance of the running paths.
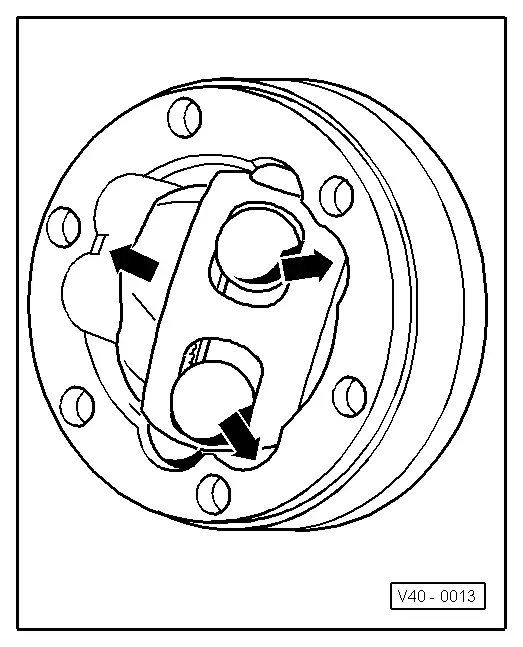
- Swing in hub with balls by pressing forcefully onto cage -arrow-.
CV joint, checking for function:
CV joint is properly assembled, if ball hub can be slid back and forth by hand over whole compensation length.
READ NEXT:
 Special Tools
Special tools and workshop equipment
required
Shock Absorber Set -T10001-
Tensioning Strap -T10038-
Tripod Joint Tool -T10065-
Locating Pins -T10096-
Engine/Gearbox Jac
Electronic Damping
Overview - Electronic Damping Component Location
Note
The body acceleration sensors may not be interchanged with
each other.
1 - Right Front Body Acceleration Sensor -G342-
SEE MORE:
Multifunction Steering Wheel
Overview - Multifunction Steering Wheel
Buttons are integrated in the steering wheel for easier
operation of Infotainment, telephone and the navigation system.
On vehicles with Tiptronic, rocker switches are also installed
on the left and right.
The Multifunction Steering Wheel Control M
Infotainment System Display, Removing and Installing
Infotainment System Display, Removing and Installing
The Front Information Display Control Head -J685- (Display)
is located in the center of the instrument panel.
The display and display support are a single unit and are
removed together. After its removal the display is removed from
the dis
